<< 2/15 >>
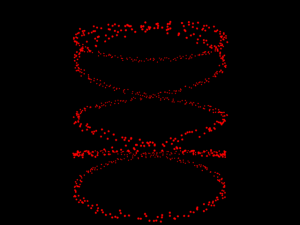
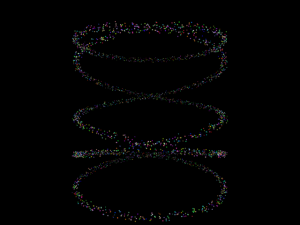
CAPIでパーティクル
Essential RenderManのパーティクルのサンプルをコンパイルしてみた。
Visual C++では,random()ではなくてrand()に書き換えたら,コンパイルできた。
>cl /I%DELIGHT%/include %DELIGHT%/lib/3delight.lib curves.c
RC本のサンプルのコンパイルでも,参照するヘッダファイルやリスト名を間違えないようにしないといけない。RCのサンプルのinclude先に間違いがあった。
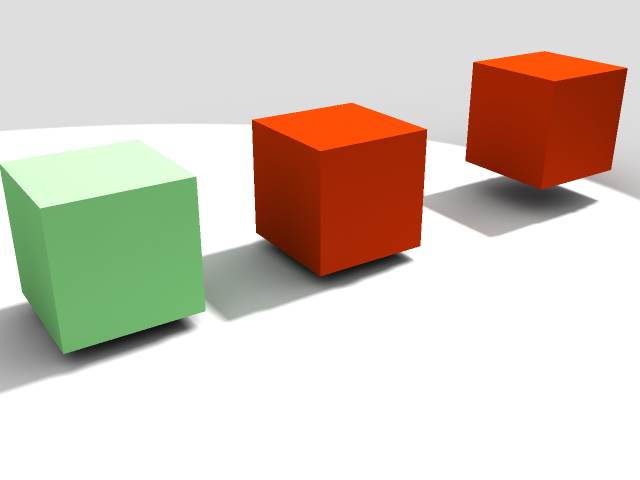
CAPIのアニメーションのRIB出力
3Delightで試してみた。RIBを出力するには,RiBegin(RI_NULL)のカッコ部分に出力するRIB名を書き込んでおいてコンパイルすればよい。
http://www.not-enough.org/abe/manual/renderman/animation.html
サンプルファイルをコンパイルしてみる。
-------------------------------------------
#include
main()
{
int frame;
char filename[128];
RtColor color = {0.8, 0.0, 0.0};
RiBegin("anim_test.rib");
for(frame = 1; frame <= 10; frame++)
{
RiFrameBegin(frame);
sprintf(filename, "sphere%d.tif", frame);
RiDisplay(filename, RI_FILE, RI_RGBA, RI_NULL);
RiWorldBegin();
RiColor(color);
RiTranslate(frame*0.1 - 0.5, 0.0, 0.0);
RiSphere(1.0, -1.0, 1.0, 360.0, RI_NULL);
RiWorldEnd();
RiFrameEnd();
}
RiEnd();
}
-----------------------------------------
1. anim_test.cで保存。
2. コンパイル
>cl /I%DELIGHT%/include %DELIGHT%/lib/3delight.lib anim_test.c
3. RIBファイルの出力
>anim_test.exe
続きを読む>>
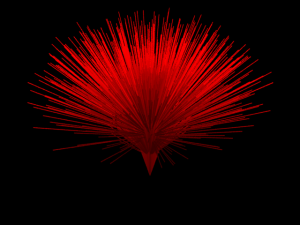
Atomosphere shader smoke
Ayamを使ってsmokeシェーダを試してみた。
さすがにレンダリングは時間がかかりますが、ワクワクしちゃいそう。
objをインポートしてスポットライトを2つずらして設定する。
smokeシェーダの設定は、以下のとおり
volume "smoke"
"opacdensity" "parameter uniform float"
Default value: 1
"lightdensity" "parameter uniform float"
Default value: 1
"integstart" "parameter uniform float"
Default value: 0
"integend" "parameter uniform float"
Default value: 100
"stepsize" "parameter uniform float"
Default value: 0.1
"maxsteps" "parameter uniform float"
Default value: 100
"scatter" "parameter uniform color"
Default value: "rgb" [1 1 1]
"smokeoctaves" "parameter uniform float"
Default value: 0
"smokefreq" "parameter uniform float"
Default value: 1
"smokevary" "parameter uniform float"
Default value: 1
最初は、何も見えません。scatterの色ょピンクにしてみたが全然見えんイ

stepsizeを0.1から1.0に変更。lightdensityを0.1にレンダリングが速くなる。

opacdensity 0.5 lightdensity 0.1 stepsize 1.0
opacdensity 0.5 lightdensity 0.01 stepsize 1.25
opacdensity 0.5 lightdensity 0.05 stepsize 1.25
opacdensity 0.1 lightdensity 0.01 stepsize 1.25
いろいろと試してみるのが一番、速いマシンが欲しい。
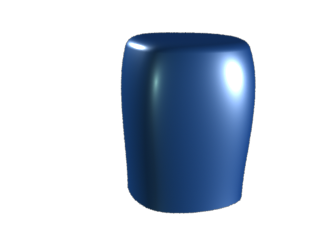
Scatterをblue系にしてみる。
opacdensity 0.2 lightdensity 0.05 stepsize 1.25
20インチ液晶モニター購入
さすがに15インチはきつい。垂直に緑のラインが入って見えにくいし、何とかしたいところで、夕方、購入した。
その分、頑張らなきゃ。Macとデジタルの口の形状が違うようで、変換アダプタとかあるのだろうか。
今日は一日いろいろといじってみる。
K3Dは奥が深いところだが、レンダラをいろいろと変えてみたが、shaderでエラーが出たりする。きちんとしたレンダラのパス指定は勝手に探しているのか。よくわからない。アニメーションの設定の変数などがよくわからないところだ。RIB出力もうまくいかない。できるのかどうかもわからない。
XSIの再インストールをした。サンプルレンダリングしてみる。
3dsmaxでのVRayのフリー版でレンダリングしてみる。設定によっては速いかも。
hamapatchからRIB出力。よくできている。あらかじめいくつかのライトがしこんであるけど、プレビュー版でも、シェアウェアでもいいから、サブディビジョンサーフェイスした面をきちんとRIB出力してくれるのだったら、大宣伝しちゃいます。可能性あるソフトウェアなんだけど、レンダラの設定、カスタマイズができると凄くいいんです。もったいない!!
勉強します。(hamapatchダウンロードサイトは閉鎖されてしまいました。2009.10)
POV2RIB
http://web.archive.org/web/*/http://www9.informatik.uni-erlangen.de/~cnvogelg/pov2rib/index.html
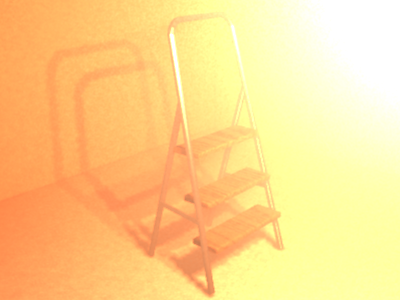
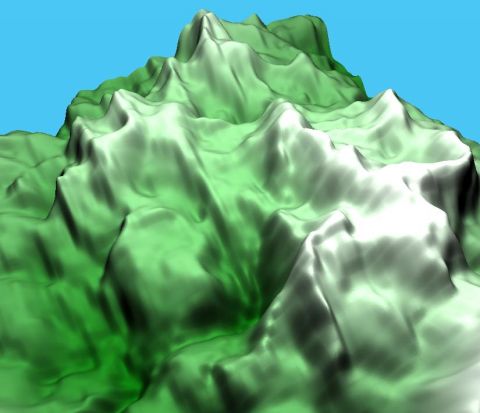
Daylon Leveller Demo
地形作成ソフトはいろいろと、趣味や目的によって使い方はいろいろだが、これは、RenderMan RIBが64×64pixelsであれば出力できた。
いろいろとフィルタかけて遊べる。
保存は出来ないが、アニメーション作成やちょっとしたショットをつくるのにはいいかもしれない。
DarkTreeのmetalRustySteel.dstsをつけてみる。
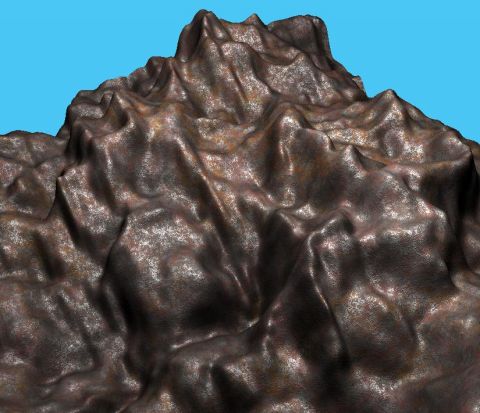
PixelSamples 4 4
ShadingRate 0.25

149ドルですが、悩むところ。レンダリングはAIRを利用。
http://www.daylongraphics.com/products/leveller/index.php
開発された
無料シェーダ
RenderMan for MayaのShader compile
RfmをインストールしてShaderを使ってコンパイルしようしたら、以下のエラー
ERROR: Cannot find preprocessor for shader
なんてことはない。環境変数environment variablesが設定されていないからだった。
マイ コンピュータを右クリック
詳細設定→環境変数→システム環境変数
「新規」で
変数名 RMANTREE
変数値 C:\Program Files\Pixar\RenderManForMaya-3.0.1-maya2008\rmantree
設定してOKをする。
続いてPATHを選択し、以下を追加。PATHを間違えて消さないように。
;%RMANTREE%\bin
再起動し、コマンドプロンプトから
Shader -helpと入れて
表示されればOK
ありがとうございます。
placecam.c
「実践CGの誘い」や、RenderMan Fastの解説サイト、RenderDotCサイトのマニュアルページに、placecam.cがある。pythonで書き換えるのもできるし、簡単にコンパイルができます。今日もありがとうございます。
/*

 * PlaceCamera(): establish a viewpoint, viewing direction and orientation

 *  for a scene. This routine must be called before RiWorldBegin().

 *  position: a point giving the camera position

 *  aim: a point giving the location at which the camera is aimed

 *  roll: an optional rotation of the camera about its direction axis

 *  coneangle: an optional spotlight shader cone angle

 */


#include

#include

#include


#define PI 3.1415926535897932


void usage(void)

{

    printf("usage: placecam pos_x pos_y pos_z aim_x aim_y aim_z\n");

    printf(" [coneangle] [roll_angle]\n");

    printf(" Calculate RenderMan transforms needed for camera transform\n");

    printf(" from light position to aim point with the given roll angle.\n");

    exit(1);

}


typedef double RtPoint[3];


void RiRotate(double angle, double x, double y, double z)

{

    if (fabs(angle) > 0.001) {

      printf("Rotate %0.2f %0.2f %0.2f %0.2f\n", angle, x, y, z);

      }

}


void RiTranslate(double dx, double dy, double dz)

{

    printf("Translate %0.2f %0.2f %0.2f\n", dx, dy, dz);

}


/*

 * AimZ(): rotate the world so the direction vector points in

 *  positive z by rotating about the y axis, then x. The cosine

 *  of each rotation is given by components of the normalized

 *  direction vector.  Before the y rotation the direction vector

 *  might be in negative z, but not afterward.

 */

void AimZ(RtPoint direction)

{

    double xzlen, yzlen, yrot, xrot;


    if (direction[0]==0 && direction[1]==0 && direction[2]==0)

      return;


    /*

     * The initial rotation about the y axis is given by the projection of

     * the direction vector onto the x,z plane: the x and z components

     * of the direction.

     */

    xzlen = sqrt(direction[0]*direction[0]+direction[2]*direction[2]);

    if (xzlen == 0)

      yrot = (direction[1] < 0) ? 180 : 0;

    else

      yrot = 180*acos(direction[2]/xzlen)/PI;


    /*

     * The second rotation, about the x axis, is given by the projection on

     * the y,z plane of the y-rotated direction vector: the original y

     * component, and the rotated x,z vector from above.

     */

    yzlen = sqrt(direction[1]*direction[1]+xzlen*xzlen);

    xrot = 180*acos(xzlen/yzlen)/PI;     /* yzlen should never be 0 */


    if (direction[1] > 0)

      RiRotate(xrot, 1.0, 0.0, 0.0);

    else

      RiRotate(-xrot, 1.0, 0.0, 0.0);


    /* The last rotation declared gets performed first */

    if (direction[0] > 0)

      RiRotate(-yrot, 0.0, 1.0, 0.0);

    else

      RiRotate(yrot, 0.0, 1.0, 0.0);

}


void PlaceCamera(RtPoint position, RtPoint direction, float roll)

{

    RiRotate(-roll, 0.0, 0.0, 1.0);

    AimZ(direction);

    RiTranslate(-position[0], -position[1], -position[2]);

}


int main(int argc, char *argv[])

{

    RtPoint pos, aim, dir;

    double roll;

    double coneangle, fov;


    if (argc < 7) usage();


    pos[0] = atof(argv[1]);

    pos[1] = atof(argv[2]);

    pos[2] = atof(argv[3]);

    aim[0] = atof(argv[4]);

    aim[1] = atof(argv[5]);

    aim[2] = atof(argv[6]);


    if (argc > 7) coneangle = atof(argv[7]);

      else coneangle = 0.0;


    if (argc > 8) roll = atof(argv[8]);

      else roll = 0.0;


    printf("position: %0.2f, %0.2f, %0.2f\n", pos[0], pos[1], pos[2]);

    printf("aim:   %0.2f, %0.2f, %0.2f\n", aim[0], aim[1], aim[2]);

    printf("coneangle: %0.4f\n", coneangle);

    printf("roll:   %0.2f\n\n", roll);


    if (coneangle != 0.0) {

      fov = coneangle * 360.0 / PI;

      printf("Projection \"perspective\" \"fov\" [%0.2f]\n", fov);

      }


    dir[0] = aim[0] - pos[0];

    dir[1] = aim[1] - pos[1];

    dir[2] = aim[2] - pos[2];


    PlaceCamera(pos, dir, roll);

    return 0;

}
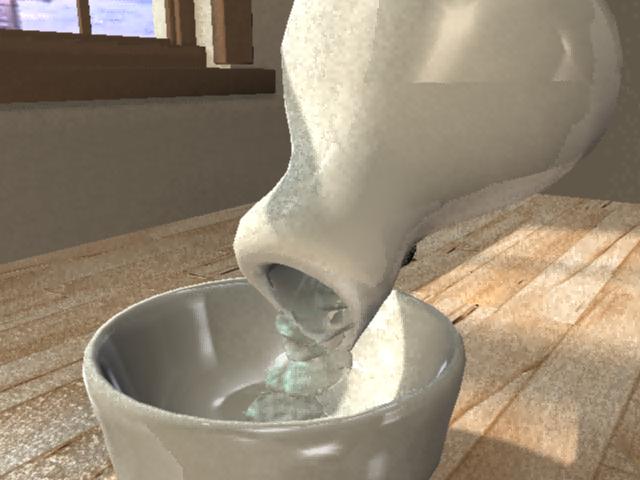
MacOS8.6でMacRenderManを使う
休み中は、片付けと再インストール。
まずは、ベージュ爺さんこと、PowerMacintosh G3 MT300にIDE40GBハードディスクを取り付ける。フロッピーディスクはことごとく壊れているか、ドライブソノモノを取替えか。休み明けに物色する必要あり。
OSを8.1→8.5→8.6まであげる。
PixelsのPixelPutty Solo1.5.2動作確認。MacRenderManにRIB出力できる。
WinMounterを使って共有をかけて、Windowsでレンダリングしてみる。
細かい設定を変更する必要あり。
スポットライトのシャドーマップを生成してくれる。intensityを8000くらいにあげないといけない。
続いて、Ailias upFRONTを起動、コプロセッサがないとエラー。仕方ないので、PowerFPUで検索するとコントロールパネルとして配布している。インストールし、upFRONT2.0起動する。画面のリフレッシュが難あり。
RIB出力するとShadowmapを生成してくれる。
さらに、押入れに隠れていたVIDI社のPresenter3Dをインストールした。
CD-ROMに傷が入っていて全部はインストールできなかった。
MacRenderManとの設定も、3Djoyと名前が変わって、サポートされていたサイトのアーカイブを拾って勉強する。
一番使いやすいソフトではないかと感激した。
Presenter3Dはver3.6.3。RIBを書き出してみたが、小文字になっていたりして今ひとつ、エディタで調整が必要である。
今はRenderMan for MayaやHoudiniがRenderManのフロントとして有名だけど、かれこれ14年前に、こんな便利な面白いソフトがあったと思うとうれしい反面、残念(T.T)。消えていったCGソフトですね。
これから、ちょっとずつ紹介していきたいところです。
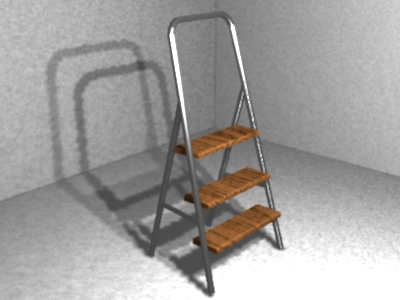
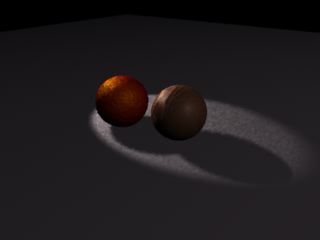
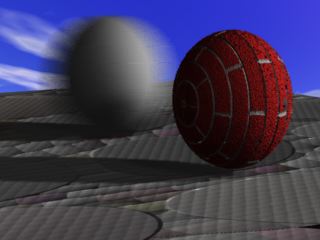
モーションブラーとBMRTシェーダのディスプレイスメントを設定してみた。地面はValisのシェーダ。
Presenter3DからMacRenderManへ
Webアーカイブから記事が読める。
有難い。
http://web.archive.org/web/*/http://plaza.harmonix.ne.jp/~takanoka/
ありがとうございます。
MacからWindowsにRIBファイルを持ってきた際、
PRManと3Delightは、問題なくレンダリングする。
Airでレンダリングしようとしたら、うんともすんとも言わない。
ライセンスは切れていないし、他のRIBは読める。
おかしいと思ったら改行コードが問題だった。MacintoshはCRのみ。
WindowsはCR+LF。
エディタで改行コードをWindows(CR+LF)にした。
レンダリングできました。
要注意でした。
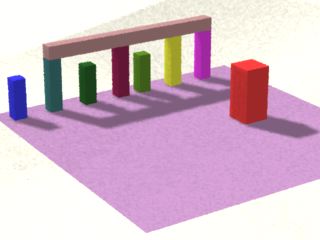
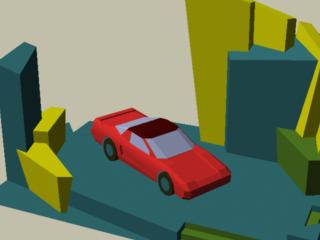
upFRONTのサンプルをAirでレンダリング。
<< 2/15 >>