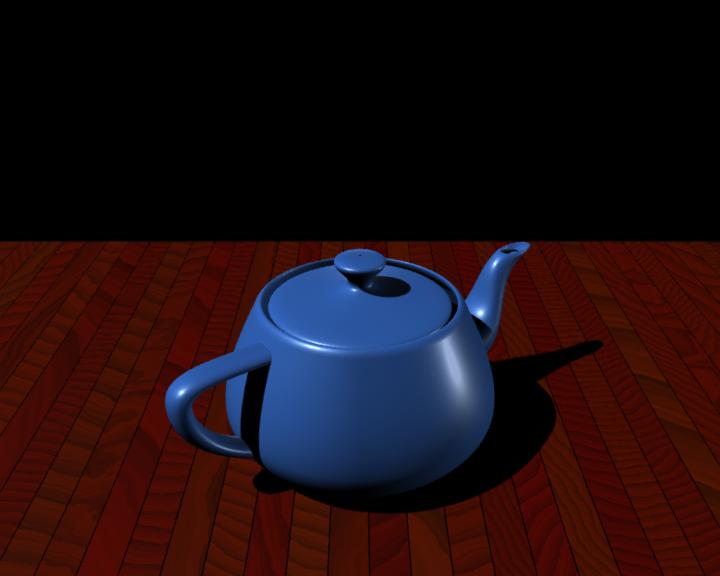
Pythonを使ってRenderManを操る その1
- RenderMan
- by yuichirou yokomakura
- 2013.01.11 Friday 05:12
とりあえず、サンプルを参考にカメラをテストしました。
イギリスのbournemouth universityを参考にしました。ありがとうございます。Thank you.

イギリスのbournemouth universityを参考にしました。ありがとうございます。Thank you.
#!/usr/bin/python

# set PYTHONPATH=C:\Python25;C:\Python25\Scripts;%RMANTREE%\bin


import sys

sys.path.append("D:\lighting\PythonClasses")


import math

import getpass

import time,random


# import the python renderman library

import prman


from vector import Vector

from Camera import *


def Scene(ri) :

	ri.AttributeBegin()

	random.seed(25)


	face=[-0.1,-1,-3, 0.1,-1,-3,-0.1,-1,3, 0.1,-1,3]

	plank=-5.0

	while (plank <=5.0) :

		ri.TransformBegin()

		ri.Color([random.uniform(0.35,0.4),random.uniform(0.1,0.025),0])

		c0=[random.uniform(-10,10),random.uniform(-10,10),random.uniform(-10,10)]

		c1=[random.uniform(-10,10),random.uniform(-10,10),random.uniform(-10,10)]

		ri.Surface("wood",{"Ks":[0.1],"point c0":c0,"point c1":c1,"float grain":random.randint(2,20)})

		ri.Translate(plank,0,0)

		ri.Patch("bilinear",{'P':face})

		ri.TransformEnd()

		plank=plank+0.206

	ri.AttributeEnd()

	ri.TransformBegin()

	ri.AttributeBegin()

	ri.Attribute( "visibility", {"trace": [1]})

	ri.Attribute( "visibility", {"int transmission": [1]})

	ri.Color([0.2,0.4,0.75])

	ri.Translate( 0,-1.0,0)

	ri.Rotate(-90,1,0,0)

	ri.Rotate(36,0,0,1)

	ri.Scale(0.4,0.4,0.4)

	ri.Surface("plastic")

	ri.Geometry("teapot")

	ri.AttributeEnd()

	ri.TransformEnd()


ri = prman.Ri() # create an instance of the RenderMan interface

#cam=Camera(Vector(4,0.2,4,1),Vector(0,0,0,1),Vector(0,1,0,0))

cam=Camera(Vector(0,2,4,1),Vector(0,0,0,1),Vector(0,1,0,0))


cam.fov=40


#filename = "Camera.rib"

filename = "__render"


ri.Begin(filename)

#ri.Begin(ri.RENDER)

ri.Declare("Light1" ,"string")

ri.Declare("Light2" ,"string")

ri.Declare("Light3" ,"string")

# now we add the display element using the usual elements

# FILENAME DISPLAY Type Output format

#ri.Display("Camera.exr", "framebuffer", "rgba")

ri.Display("Camera.png", "file", "rgb")

cam.Format(ri)


# now we start our world

ri.WorldBegin()

ri.LightSource("shadowdistant",{ri.HANDLEID:"Light1", "from": [ -10, 10, -10], "to": [ 0, 0, 0], "intensity":[2.0], "string shadowname": ["raytrace"]})

#ri.LightSource( "pointlight", {ri.HANDLEID:"Light1", "point from":[-2,2,4], "float intensity": [50]})

ri.LightSource( "distantlight", {ri.HANDLEID:"Light2", "point to":[-1,-0.03,0], "float intensity": [1]})

ri.LightSource( "distantlight", {ri.HANDLEID:"Light3", "point to":[0,-0.5,-1], "float intensity": [0.2]})


ri.Illuminate("Light1",1)

ri.Illuminate("Light2",1)

ri.Illuminate("Light3",1)

cam.Place(ri)

ri.TransformBegin()

Scene(ri)

ri.TransformEnd()

# end our world

ri.WorldEnd()

# and finally end the rib file

ri.End()

- -
- -