1/2 >>

PythonからRenderMan その4

イギリスのbournemouth universityを参考にしてます。ありがとうございます。Thank You.
RenderManProServer-14からついているimport prmanを利用します。
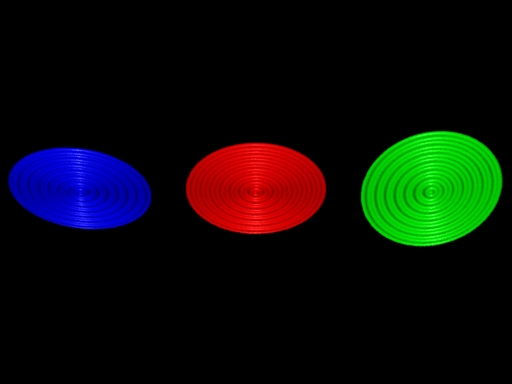
InlineArchive.jpg


#inlinearchive_pr.py
#set PYTHONPATH=C:\Python25;C:\Python\Scripts;%RMANTREE%\bin
import getpass
import time
# import the python renderman library
import prman

ri = prman.Ri() # create an instance of the RenderMan interface
ri.Option("rib", {"string asciistyle": "indented"})

filename = "InlineArchive.rib"

ri.Begin(ri.RENDER)

ri.ArchiveBegin("Wave")
ri.Rotate(90,1,0,0)
ri.Sphere(0.030303,-0.030303,0,360)
ri.Torus(0.0606061,0.030303,0,180,360)
ri.Torus(0.121212,0.030303,180,360,360)
ri.Torus(0.181818,0.030303,0,180,360)
ri.Torus(0.242424,0.030303,180,360,360)
ri.Torus(0.30303,0.030303,0,180,360)
ri.Torus(0.363636,0.030303,180,360,360)
ri.Torus(0.424242,0.030303,0,180,360)
ri.Torus(0.484848,0.030303,180,360,360)
ri.Torus(0.545455,0.030303,0,180,360)
ri.Torus(0.606061,0.030303,180,360,360)
ri.Torus(0.666667,0.030303,0,180,360)
ri.Torus(0.727273,0.030303,180,360,360)
ri.Torus(0.787879,0.030303,0,180,360)
ri.Torus(0.848485,0.030303,180,360,360)
ri.ArchiveEnd()

#ArchiveRecord is used to add elements to the rib stream in this case comments
# note the function is overloaded so we can concatinate output
ri.ArchiveRecord(ri.COMMENT, 'File ' +filename)
ri.ArchiveRecord(ri.COMMENT, "Created by " + getpass.getuser())
ri.ArchiveRecord(ri.COMMENT, "Creation Date: " +time.ctime(time.time()))

# now we add the display element using the usual elements
# FILENAME DISPLAY Type Output format
ri.Display("InlineArchive.png", "file", "rgb")
ri.Format(512, 384, -1.0)
ri.Projection(ri.PERSPECTIVE,{ri.FOV:30})

# now we start our world
colours ={
"red":[1,0,0],
"white":[1,1,1],
"green":[0,1,0],
"blue":[0,0,1],
"black":[0,0,0],
"yellow":[1,1,0]
}

# start our world
ri.WorldBegin()
ri.LightSource("distantlight", {ri.HANDLEID: "1","to":[0,0,1]})
ri.LightSource("ambientlight", {ri.HANDLEID: "2", "intensity":[0.4]})

ri.Translate(0,0,9) #move the global view position
ri.Surface("plastic")

ri.TransformBegin()
ri.Rotate(40,1,0,0)
ri.Color(colours["red"])
ri.Attribute ("identifier",{"name": "Wave1"})
ri.ReadArchive("Wave")
ri.TransformEnd()

ri.TransformBegin()
ri.Rotate(55,1,0,0)
ri.Color(colours["green"])
ri.Translate(2.2,0,0)
ri.Attribute( "identifier",{ "name" :"Wave2"})
ri.ReadArchive("Wave")
ri.TransformEnd()

ri.TransformBegin()
ri.Rotate(35,1,0,0)
ri.Color(colours["blue"])
ri.Translate(-2.2,0,0)
ri.Attribute("identifier",{ "name" : "Wave3"})
ri.ReadArchive("Wave")
ri.TransformEnd()
#end our world

ri.WorldEnd()
ri.End()

  • -
  • -

PythonからRenderMan その5

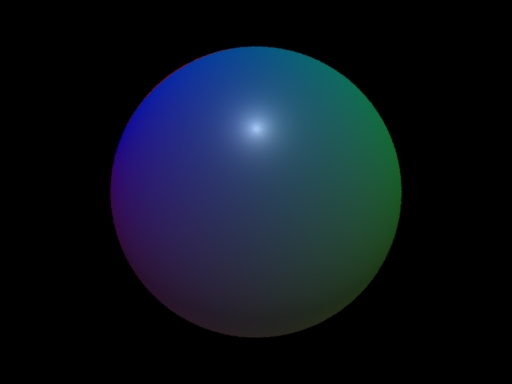
引き続き、イギリスのbournemouth universityを参考にしてます。ありがとうございます。勉強になります。Csを球にセットしてます。
RenderManProServer-14からついているimport prmanを利用します。
Param.jpg


#param_pr.py
#set PYTHONPATH=C:\Python25;C:\Python\Scripts;%RMANTREE%\bin
import getpass
import time
# import the python renderman library
import prman

ri = prman.Ri() # create an instance of the RenderMan interface
ri.Option("rib", {"string asciistyle": "indented"})

filename = "Param.rib"
ri.Begin(ri.RENDER)
# ArchiveRecord is used to add elements to the rib stream in this case comments
# note the function is overloaded so we can concatinate output
ri.ArchiveRecord(ri.COMMENT, 'File ' +filename)
ri.ArchiveRecord(ri.COMMENT, "Created by " + getpass.getuser())
ri.ArchiveRecord(ri.COMMENT, "Creation Date: " +time.ctime(time.time()))

# now we add the display element using the usual elements
# FILENAME DISPLAY Type Output format
ri.Display("Param.png", "file", "rgb")
ri.Format(512, 384, -1.0)
# now set the projection to perspective
ri.Projection(ri.PERSPECTIVE,{ri.FOV:50})

# now we start our world
ri.WorldBegin()
ri.LightSource("distantlight", {ri.HANDLEID: "1","to":[0,-1,1]})
ri.LightSource("ambientlight", {ri.HANDLEID: "2", "intensity":[0.4]})

ri.Translate(0,0,3)
ri.TransformBegin()
colours=[1,0,0,0,0,1,1,0,0,0,1,0]
ri.Rotate(90,1,1,1)
ri.Surface("plastic")
ri.Sphere(1,-1,1,360,{"Cs":colours})
ri.TransformEnd()
ri.WorldEnd()
ri.End()

  • -
  • -

PythonからRenderMan その6

ケッソン先生のCG References & Tutorials(fundza.com)の RenderMan Procedural Primitives、Randomnessのサンプルをimport prmanでできるようにしてみた。ありがとうございます。
ri.Points({ri.P:points,ri.CS:colour,ri.CONSTANTWIDTH:size})
TypeError: Problem parsing parameterlist entry: varying color Cs
とエラーが出ていたが、pointsのリスト表記を[[1,2,3],[4,5,6],・・・]としていたのが原因だった。[1,2,3,4,5,6,・・・]となるように書き換えた。
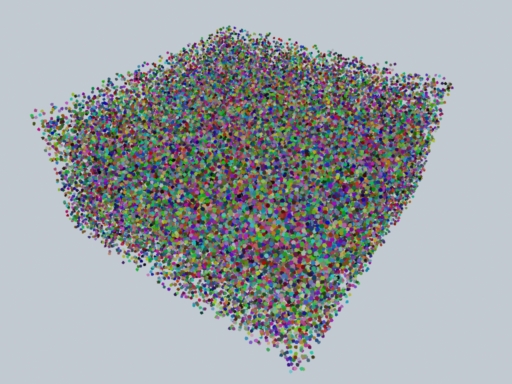
rectangularbox.jpg
Pointsを50000個、直方体に配置してみました。さらに勉強します。


#rectangularbox_pr2.py
#Modified from RenderMan Procedural Primitives/ Randomness Examples
# in CG References & Tutorials(fundza.com)

#set PYTHONPATH=C:\Python25;C:\Python\Scripts;%RMANTREE%\bin
import getpass
import time
# import the python renderman library
import prman

import random,math

def randBetween(min, max):
return random.random() * (max - min) + min

def length(x, y, z):
return math.sqrt(x*x + y*y + z*z)

def normalize(x, y, z):
len = length(x, y, z)
return x/len, y/len, z/len

def scaleVector(x, y, z, sc):
return x*sc, y*sc, z*sc

def box(width, height, depth, num, size):
points=[]
pappend=points.append
for n in range(num):
x = randBetween(-width/2, width/2)
y = randBetween(-height/2, height/2)
z = randBetween(-depth/2, depth/2)
pappend(x)
pappend(y)
pappend(z)
colour=[]
for n in range(num):
r = randBetween(0, 1)
g = randBetween(0, 1)
b = randBetween(0, 1)
colour.append(r)
colour.append(g)
colour.append(b)


ri.Points({ri.P:points,ri.CS:colour,ri.CONSTANTWIDTH:size})


ri = prman.Ri() # create an instance of the RenderMan interface
ri.Option("rib", {"string asciistyle": "indented"})

filename = "rectangularbox.rib"
ri.Begin(ri.RENDER)
#ri.Begin(filename)
# ArchiveRecord is used to add elements to the rib stream in this case comments
# note the function is overloaded so we can concatinate output
ri.ArchiveRecord(ri.COMMENT, 'File ' +filename)
ri.ArchiveRecord(ri.COMMENT, "Created by " + getpass.getuser())
ri.ArchiveRecord(ri.COMMENT, "Creation Date: " +time.ctime(time.time()))

# now we add the display element using the usual elements
# FILENAME DISPLAY Type Output format
ri.Display("rectangularbox.png", "file", "rgb")
ri.Format(512, 384, -1.0)
ri.Imager("background", {"color color":(.76,.79,.82)})
# now set the projection to perspective
ri.Projection(ri.PERSPECTIVE,{ri.FOV:50})

# now we start our world
ri.WorldBegin()
ri.LightSource("distantlight", {ri.HANDLEID: "1","to":[0,1,1]})
ri.LightSource("ambientlight", {ri.HANDLEID: "2", "intensity":[0.4]})

ri.Translate(0,0.25,3)
ri.Rotate(-40,1,0,0)
ri.TransformBegin()
ri.Rotate(35,0,1,0)
ri.Surface("plastic")
box(2.0, 1.0, 2.0, 50000, 0.02)
ri.TransformEnd()
ri.WorldEnd()
ri.End()

  • -
  • -

PythonからRenderMan その7

ケッソン先生のページを参照しました。Thank you
import prmanを使っています。
ありがとうございます。
ring(rad, num, size)
ring(1.5, 150, 0.2)
ring_pr.jpg


#ring_pr.py
#Modified from RenderMan Procedural Primitives/ Randomness Examples
# in CG References & Tutorials(fundza.com)

#set PYTHONPATH=C:\Python25;C:\Python\Scripts;%RMANTREE%\bin
import getpass
import time
# import the python renderman library
import prman

import random,math

def randBetween(min, max):
return random.random() * (max - min) + min

def length(x, y, z):
return math.sqrt(x*x + y*y + z*z)

def normalize(x, y, z):
len = length(x, y, z)
return x/len, y/len, z/len

def scaleVector(x, y, z, sc):
return x*sc, y*sc, z*sc

def ring(rad, num, size):
points=[]
pappend=points.append
for n in range(num):
x = randBetween(-1, 1)
y = 0
z = randBetween(-1, 1)
x,y,z = normalize(x,y,z)
x,y,z = scaleVector(x,y,z,rad)
pappend(x)
pappend(y)
pappend(z)
colour=[]
for n in range(num):
r = randBetween(0, 1)
g = randBetween(0, 1)
b = randBetween(0, 1)
colour.append(r)
colour.append(g)
colour.append(b)


ri.Points({ri.P:points,ri.CS:colour,ri.CONSTANTWIDTH:size})


ri = prman.Ri() # create an instance of the RenderMan interface
ri.Option("rib", {"string asciistyle": "indented"})

filename = "rectangularbox.rib"
ri.Begin(ri.RENDER)
#ri.Begin(filename)
# ArchiveRecord is used to add elements to the rib stream in this case comments
# note the function is overloaded so we can concatinate output
ri.ArchiveRecord(ri.COMMENT, 'File ' +filename)
ri.ArchiveRecord(ri.COMMENT, "Created by " + getpass.getuser())
ri.ArchiveRecord(ri.COMMENT, "Creation Date: " +time.ctime(time.time()))

# now we add the display element using the usual elements
# FILENAME DISPLAY Type Output format
ri.Display("ring_pr.png", "file", "rgb")
ri.Format(512, 384, -1.0)
ri.Imager("background", {"color color":(.76,.79,.82)})
# now set the projection to perspective
ri.Projection(ri.PERSPECTIVE,{ri.FOV:50})

# now we start our world
ri.WorldBegin()
ri.LightSource("distantlight", {ri.HANDLEID: "1","to":[0,1,1]})
ri.LightSource("ambientlight", {ri.HANDLEID: "2", "intensity":[0.4]})

ri.Translate(0,0.25,3)
ri.Rotate(-40,1,0,0)
ri.TransformBegin()
ri.Rotate(35,0,1,0)
ri.Surface("plastic")
ring(1.5, 150, 0.2)
ri.TransformEnd()
ri.WorldEnd()
ri.End()

  • -
  • -

PythonからRenderMan その8

さらに、diskでやってみました。面白いですね。
import prmanを使っています。
disk_pr.jpg


#disk_pr.py
#Modified from RenderMan Procedural Primitives/ Randomness Examples
# in CG References & Tutorials(fundza.com)

#set PYTHONPATH=C:\Python25;C:\Python\Scripts;%RMANTREE%\bin
import getpass
import time
# import the python renderman library
import prman

import random,math

def randBetween(min, max):
return random.random() * (max - min) + min

def length(x, y, z):
return math.sqrt(x*x + y*y + z*z)

def normalize(x, y, z):
len = length(x, y, z)
return x/len, y/len, z/len

def scaleVector(x, y, z, sc):
return x*sc, y*sc, z*sc

def disk(rad, num, size):
points=[]
pappend=points.append
for n in range(num):
x = randBetween(-1, 1)
y = 0
z = randBetween(-1, 1)
x,y,z = normalize(x,y,z)
randRadius = randBetween(0, rad)
x,y,z = scaleVector(x,y,z,randRadius)
pappend(x)
pappend(y)
pappend(z)
colour=[]
for n in range(num):
r = randBetween(0, 1)
g = randBetween(0, 1)
b = randBetween(0, 1)
colour.append(r)
colour.append(g)
colour.append(b)


ri.Points({ri.P:points,ri.CS:colour,ri.CONSTANTWIDTH:size})


ri = prman.Ri() # create an instance of the RenderMan interface
ri.Option("rib", {"string asciistyle": "indented"})

filename = "rectangularbox.rib"
ri.Begin(ri.RENDER)
#ri.Begin(filename)
# ArchiveRecord is used to add elements to the rib stream in this case comments
# note the function is overloaded so we can concatinate output
ri.ArchiveRecord(ri.COMMENT, 'File ' +filename)
ri.ArchiveRecord(ri.COMMENT, "Created by " + getpass.getuser())
ri.ArchiveRecord(ri.COMMENT, "Creation Date: " +time.ctime(time.time()))

# now we add the display element using the usual elements
# FILENAME DISPLAY Type Output format
ri.Display("disk_pr.png", "file", "rgb")
ri.Format(512, 384, -1.0)
ri.Imager("background", {"color color":(.76,.79,.82)})
# now set the projection to perspective
ri.Projection(ri.PERSPECTIVE,{ri.FOV:50})

# now we start our world
ri.WorldBegin()
ri.LightSource("distantlight", {ri.HANDLEID: "1","to":[0,1,1]})
ri.LightSource("ambientlight", {ri.HANDLEID: "2", "intensity":[0.4]})

ri.Translate(0,0.25,3)
ri.Rotate(-40,1,0,0)
ri.TransformBegin()
ri.Rotate(35,0,1,0)
ri.Surface("plastic")
disk(1.5, 10000, 0.02)
ri.TransformEnd()
ri.WorldEnd()
ri.End()

  • -
  • -

PythonからRenderMan その9

ケッソン先生のページを参照しました。Thank you
import prmanを使っています。
ありがとうございます。円すいを作ってみました。
cone_pr.jpg


#cone_pr.py
#Modified from RenderMan Procedural Primitives/ Randomness Examples
# in CG References & Tutorials(fundza.com)

#set PYTHONPATH=C:\Python25;C:\Python\Scripts;%RMANTREE%\bin
import getpass
import time
# import the python renderman library
import prman

import random,math

def randBetween(min, max):
return random.random() * (max - min) + min

def length(x, y, z):
return math.sqrt(x*x + y*y + z*z)

def normalize(x, y, z):
len = length(x, y, z)
return x/len, y/len, z/len

def scaleVector(x, y, z, sc):
return x*sc, y*sc, z*sc

def cone(rad, num, size):
points=[]
pappend=points.append
for n in range(num):
x = randBetween(-1, 1)
y = 0
z = randBetween(-1, 1)
x,y,z = normalize(x,y,z)
randRadius = randBetween(0, rad)
x,y,z = scaleVector(x,y,z,randRadius)
y += 1 - randRadius # <<---
pappend(x)
pappend(y)
pappend(z)
colour=[]
for n in range(num):
r = randBetween(0, 1)
g = randBetween(0, 1)
b = randBetween(0, 1)
colour.append(r)
colour.append(g)
colour.append(b)


ri.Points({ri.P:points,ri.CS:colour,ri.CONSTANTWIDTH:size})


ri = prman.Ri() # create an instance of the RenderMan interface
ri.Option("rib", {"string asciistyle": "indented"})

filename = "cone_pr.rib"
ri.Begin(ri.RENDER)
#ri.Begin(filename)
# ArchiveRecord is used to add elements to the rib stream in this case comments
# note the function is overloaded so we can concatinate output
ri.ArchiveRecord(ri.COMMENT, 'File ' +filename)
ri.ArchiveRecord(ri.COMMENT, "Created by " + getpass.getuser())
ri.ArchiveRecord(ri.COMMENT, "Creation Date: " +time.ctime(time.time()))

# now we add the display element using the usual elements
# FILENAME DISPLAY Type Output format
ri.Display("cone_pr.png", "file", "rgb")
ri.Format(512, 384, -1.0)
ri.Imager("background", {"color color":(.76,.79,.82)})
# now set the projection to perspective
ri.Projection(ri.PERSPECTIVE,{ri.FOV:50})

# now we start our world
ri.WorldBegin()
ri.LightSource("distantlight", {ri.HANDLEID: "1","to":[0,1,1]})
ri.LightSource("ambientlight", {ri.HANDLEID: "2", "intensity":[0.4]})

ri.Translate(0,0.25,3)
ri.Rotate(-40,1,0,0)
ri.TransformBegin()
ri.Rotate(35,0,1,0)
ri.Surface("plastic")
cone(1.5, 10000, 0.02)
ri.TransformEnd()
ri.WorldEnd()
ri.End()

  • -
  • -

PythonからRenderMan その10

円柱つくりました。
ケッソン先生のページを参照しました。Thank you
import prmanを使っています。
ありがとうございます。
cylinder_pr.jpg


#cylinder_pr.py
#Modified from RenderMan Procedural Primitives/ Randomness Examples
# in CG References & Tutorials(fundza.com)

#set PYTHONPATH=C:\Python25;C:\Python\Scripts;%RMANTREE%\bin
import getpass
import time
# import the python renderman library
import prman

import random,math

def randBetween(min, max):
return random.random() * (max - min) + min

def length(x, y, z):
return math.sqrt(x*x + y*y + z*z)

def normalize(x, y, z):
len = length(x, y, z)
return x/len, y/len, z/len

def scaleVector(x, y, z, sc):
return x*sc, y*sc, z*sc


def cylinder(rad, depth, height, num, size):
points=[]
pappend=points.append
for n in range(num):
x = randBetween(-1, 1)
y = 0
z = randBetween(-1, 1)
x,y,z = normalize(x,y,z)
y = randBetween(depth, height) # <<---
pappend(x)
pappend(y)
pappend(z)
colour=[]
for n in range(num):
r = randBetween(0, 1)
g = randBetween(0, 1)
b = randBetween(0, 1)
colour.append(r)
colour.append(g)
colour.append(b)


ri.Points({ri.P:points,ri.CS:colour,ri.CONSTANTWIDTH:size})


ri = prman.Ri() # create an instance of the RenderMan interface
ri.Option("rib", {"string asciistyle": "indented"})

filename = "cylinder_pr.rib"
ri.Begin(ri.RENDER)
#ri.Begin(filename)
# ArchiveRecord is used to add elements to the rib stream in this case comments
# note the function is overloaded so we can concatinate output
ri.ArchiveRecord(ri.COMMENT, 'File ' +filename)
ri.ArchiveRecord(ri.COMMENT, "Created by " + getpass.getuser())
ri.ArchiveRecord(ri.COMMENT, "Creation Date: " +time.ctime(time.time()))

# now we add the display element using the usual elements
# FILENAME DISPLAY Type Output format
ri.Display("cylinder_pr.png", "file", "rgb")
ri.Format(512, 384, -1.0)
ri.Imager("background", {"color color":(.76,.79,.82)})
# now set the projection to perspective
ri.Projection(ri.PERSPECTIVE,{ri.FOV:50})

# now we start our world
ri.WorldBegin()
ri.LightSource("distantlight", {ri.HANDLEID: "1","to":[0,1,1]})
ri.LightSource("ambientlight", {ri.HANDLEID: "2", "intensity":[0.4]})

ri.Translate(0,0.25,3)
ri.Rotate(-40,1,0,0)
ri.TransformBegin()
ri.Rotate(35,0,1,0)
ri.Surface("plastic")
cylinder(1.5, -1.2, 1.0, 20000, 0.02)
ri.TransformEnd()
ri.WorldEnd()
ri.End()

  • -
  • -

PythonからRenderMan その11

球体つくりました。
ケッソン先生のページを参照しました。Thank you
import prmanを使っています。
ありがとうございます。さらに勉強ですね。
spheres_pr.jpg


#spheres_pr.py
#Modified from RenderMan Procedural Primitives/ Randomness Examples
# in CG References & Tutorials(fundza.com)

#set PYTHONPATH=C:\Python25;C:\Python\Scripts;%RMANTREE%\bin
import getpass
import time
# import the python renderman library
import prman

import random,math

def randBetween(min, max):
return random.random() * (max - min) + min

def length(x, y, z):
return math.sqrt(x*x + y*y + z*z)

def normalize(x, y, z):
len = length(x, y, z)
return x/len, y/len, z/len

def scaleVector(x, y, z, sc):
return x*sc, y*sc, z*sc

def spheres(rad, num, size):
for n in range(num):
x = randBetween(-1.0, 1.0)
y = randBetween(-1.0, 1.0)
z = randBetween(-1.0, 1.0)
x,y,z = normalize(x,y,z)
ri.TransformBegin()
ri.Translate(x,y,z)
ri.Color((x,y,z))
ri.Sphere(size, -size, size,360)
ri.TransformEnd()


ri = prman.Ri() # create an instance of the RenderMan interface
ri.Option("rib", {"string asciistyle": "indented"})

filename = "spheres_pr.rib"
ri.Begin(ri.RENDER)
#ri.Begin(filename)
# ArchiveRecord is used to add elements to the rib stream in this case comments
# note the function is overloaded so we can concatinate output
ri.ArchiveRecord(ri.COMMENT, 'File ' +filename)
ri.ArchiveRecord(ri.COMMENT, "Created by " + getpass.getuser())
ri.ArchiveRecord(ri.COMMENT, "Creation Date: " +time.ctime(time.time()))

# now we add the display element using the usual elements
# FILENAME DISPLAY Type Output format
ri.Display("spheres_pr.png", "file", "rgb")
ri.Format(512, 384, -1.0)
ri.Imager("background", {"color color":(.76,.79,.82)})
# now set the projection to perspective
ri.Projection(ri.PERSPECTIVE,{ri.FOV:50})

# now we start our world
ri.WorldBegin()
ri.LightSource("distantlight", {ri.HANDLEID: "1","to":[0,1,1]})
ri.LightSource("ambientlight", {ri.HANDLEID: "2", "intensity":[0.4]})

ri.Translate(0,0,3)
ri.Rotate(-40,1,0,0)
ri.TransformBegin()
ri.Rotate(35,0,1,0)
ri.Surface("plastic")
spheres(1.2, 1000, 0.06)
ri.TransformEnd()
ri.WorldEnd()
ri.End()

  • -
  • -

PythonからRenderMan その12

Jon Macey Computer Animation Pages参考にしています。Thank you.
Torus animationです。
ProcGeom001.jpg
ProcGeom002.jpg
ProcGeom003.jpg
ProcGeom014.jpg
ProcGeom029.jpg


#proc_geom.py
#set PYTHONPATH=C:\Python25;C:\Python\Scripts;%RMANTREE%\bin
import getpass
import time
# import the python renderman library
import prman

def TorusWave(ri,nwaves,thetamax) :
if(nwaves < 1) :
print "need positive number of waves"
return
innerrad = 2.0/(8.0 * nwaves +2)
ri.Rotate(90.0,1.0,0.0,0.0)
ri.Sphere(innerrad,-innerrad,0,thetamax)
outerrad =0.0
for wave in range(1,nwaves) :
outerrad=outerrad+(innerrad*2)
ri.Torus(outerrad,innerrad,0.0,180.0,thetamax)
outerrad=outerrad+(innerrad*2)
ri.Torus(outerrad,innerrad,180.0,360.0,thetamax)


ri = prman.Ri() # create an instance of the RenderMan interface
ri.Option("rib", {"string asciistyle": "indented"})


for frame in range(1,30) :
filename = "Wave.%03d.rib" %(frame)
ri.Begin(ri.RENDER)
# this is the begining of the rib archive generation we can only
# make RI calls after this function else we get a core dump
# ArchiveRecord is used to add elements to the rib stream in this case comments
# note the function is overloaded so we can concatinate output
ri.ArchiveRecord(ri.COMMENT, 'File ' +filename)
ri.ArchiveRecord(ri.COMMENT, "Created by " + getpass.getuser())
ri.ArchiveRecord(ri.COMMENT, "Creation Date: " +time.ctime(time.time()))

# now we add the display element using the usual elements
# FILENAME DISPLAY Type Output format
ri.Display("ProcGeom%03d.tif" %(frame), "file", "rgb")
# Specify PAL resolution 1:1 pixel Aspect ratio
ri.Format(512, 384, -1.0)
# now set the projection to perspective
ri.Projection(ri.PERSPECTIVE,{ri.FOV:50})

# now we start our world
ri.WorldBegin()

ri.Translate(0,0,2)

ri.Rotate(-25,1,0,0)

ri.TransformBegin()
ri.Color([1,0,0])
TorusWave(ri,frame,360.0)
ri.TransformEnd()
ri.WorldEnd()

# and finally end the rib file
ri.End()


  • -
  • -

PythonからRenderMan その13

ドーナツ作り。以前の記事を書き換えたものです。ありがとうございます。


#proc_torus2_pr.py
#set PYTHONPATH=C:\Python25;C:\Python\Scripts;%RMANTREE%\bin
import getpass
import time
# import the python renderman library
import prman

ri = prman.Ri() # create an instance of the RenderMan interface
ri.Option("rib", {"string asciistyle": "indented"})

filename = "proc_geom.rib"

ri.Begin(ri.RENDER)

def TorusWave(ri,nwaves,thetamax) :
if(nwaves < 1) :
print "need positive number of waves"
return
innerrad = 2.0/(8.0 * nwaves +2)
ri.Rotate(90.0,1.0,0.0,0.0)
ri.Sphere(innerrad,-innerrad,0,thetamax)
outerrad =0.0
for wave in range(1,nwaves) :
outerrad=outerrad+(innerrad*2)
ri.Torus(outerrad,innerrad,0.0,180.0,thetamax)
outerrad=outerrad+(innerrad*2)
ri.Torus(outerrad,innerrad,180.0,360.0,thetamax)


#ArchiveRecord is used to add elements to the rib stream in this case comments
# note the function is overloaded so we can concatinate output
ri.ArchiveRecord(ri.COMMENT, 'File ' +filename)
ri.ArchiveRecord(ri.COMMENT, "Created by " + getpass.getuser())
ri.ArchiveRecord(ri.COMMENT, "Creation Date: " +time.ctime(time.time()))

# now we add the display element using the usual elements
# FILENAME DISPLAY Type Output format
ri.Display("proc_torus2.png", "file", "rgb")
ri.Format(512, 384, -1.0)
ri.Projection(ri.PERSPECTIVE,{ri.FOV:30})

# now we start our world
colours ={
"red":[1,0,0],
"white":[1,1,1],
"green":[0,1,0],
"blue":[0,0,1],
"black":[0,0,0],
"yellow":[1,1,0]
}

# start our world
ri.WorldBegin()
ri.LightSource("distantlight", {ri.HANDLEID: "1","to":[0,0,1]})
ri.LightSource("ambientlight", {ri.HANDLEID: "2", "intensity":[0.4]})

ri.Translate(0,0,9) #move the global view position
ri.Surface("plastic")

ri.TransformBegin()
ri.Rotate(40,1,0,0)
ri.Color(colours["red"])
ri.Attribute ("identifier",{"name": "Wave1"})
TorusWave(ri,8,360.0)
ri.TransformEnd()

ri.TransformBegin()
ri.Rotate(55,1,0,0)
ri.Color(colours["green"])
ri.Translate(2.2,0,0)
ri.Attribute( "identifier",{ "name" :"Wave2"})
TorusWave(ri,8,360.0)
ri.TransformEnd()

ri.TransformBegin()
ri.Rotate(35,1,0,0)
ri.Color(colours["blue"])
ri.Translate(-2.2,0,0)
ri.Attribute("identifier",{ "name" : "Wave3"})
TorusWave(ri,8,360.0)
ri.TransformEnd()
#end our world

ri.WorldEnd()
ri.End()


  • -
  • -

1/2 >>