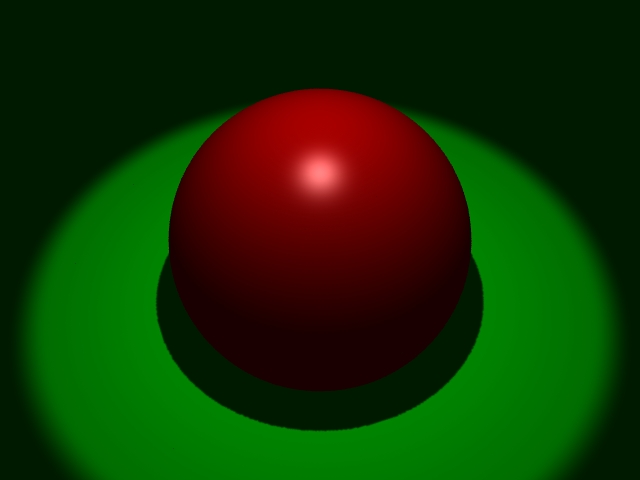
Guile RMan is a set of bindings for the RenderMan API
- RenderMan
- by yuichirou yokomakura
- 2013.11.05 Tuesday 23:54
Guile RMan is a set of bindings for the RenderMan API as implemented by Aqsis, using SWIG and libffi.
Support for function callbacks written in Scheme
Support Scheme RiProcedurals
Type checking for named paramter lists
Support for both immediate rendering and RIB output
A utilities module to provide simple wrapper around RenderMan block structure
https://github.com/tcolgate/guile-rman
インストール方法いろいろ試してみました。
32ビットLinuxで動作します。
Aqsisは1.6.0
gnu guile2.0.9(最低2.0.0で動きます。)
guile-lib0.2.2(最低0.2.0で動きます。)
■Windows7 64bitにVirtualBoxを入れ、CentOS6.3 i686上で動作確認しました。
●準備
Aqsis1.6をインストールします。
リポジトリにEPELを設定するとしAqsis1.6があります。
http://www.tooyama.org/yum-addrepo-epel.html
を参考にEPELを設定します。
管理者で
#yum --enablerepo=epel search aqsis
で探します。
============================== N/S Matched: aqsis ==============================
aqsis-core.i686 : Command-line tools for Aqsis Renderer
aqsis-data.noarch : Example content for Aqsis Renderer
aqsis-devel.i686 : Development files for Aqsis Renderer
aqsis-libs.i686 : Library files for Aqsis Renderer
aqsis.i686 : Open source 3D rendering solution adhering to the RenderMan: standard
と出てきたら、
yum --enablerepo=epel install aqsis-devel.i686
をインストールすると関連ファイルも含めて全部入れてくれます。
●guile-rman関連のインストール
1. SWIGをインストールします。swig-2.0.11をダウンロードし
$ ./configure
$ make
# make install
します。
CentOSのSWIGは1.3と古いので入れていたら削除します。
2. gnu guile2.0.9をダウンロードします。
https://www.gnu.org/software/guile/download.html
$./configure
うまく行かない場合は、指示を見て
以下のツールをあらかじめインストールします。
readline-devel
texinfo
ltdl-devel
gmp-devel
libunistring-devel
libffi-devel
gc-devel
gc
PCRE-devel
入れたら
$ ./configure
$ make
とても時間がかかります。
管理者になって
# make install
/usr/local/binにインストールされます。
アンインストールは
# make uninstall
でできます。
3. guile-lib0.2.2をダウンロードします。
http://www.nongnu.org/guile-lib/download/
$ ./configure
$ make
管理者になって
# make install
アンインストールは
# make uninstall
でできます。
4. guile-rman のインストール
$ sh autogen.sh
$ ./configure
以上を行います。
guile-rman-master/src/Makefileを以下のように変更。
-I/usr/local/include/aqsisを
-I/usr/include/aqsis
-I/usr/local/includeを
-I/usr/local/include/guile/2.0
rispec.iを以下のように変更。
includeで検索し、
4行目ri.h
ri/ri.h
5行目rif.h
ri/rif.h
107行目ri_types.h
ri/ritypes.h
308行目aqsis/config.h
config.h
309行目ri.h
ri/ri.h
310行目rif.h
ri/rif.h
313行目ri.inl
ri/ri.inl
$ make
をします。
うまく行かない場合。
$ make 2>&1 | tee make.log
を使ってエラー確認、make.logをのぞいて確認すると良いです。
無事makeできたら、
管理者になって
# make install
アンインストールは
# make uninstall
でできます。
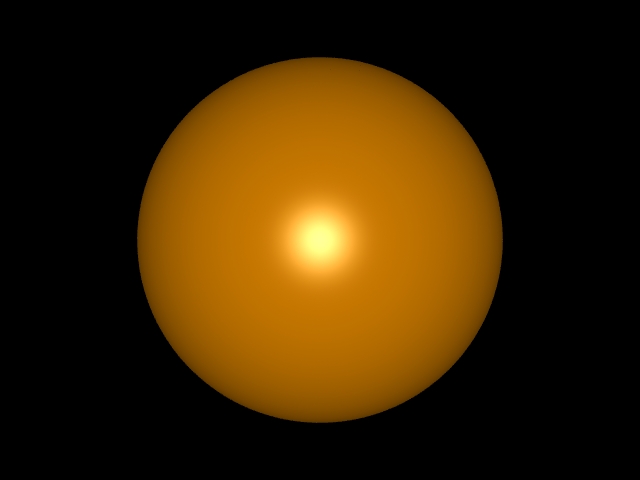
以下のサンプルを試してみましょう。simple.scmとして保存します。
$ guile simple.scm
と実行することで、simple.tifが出力されれば成功です。
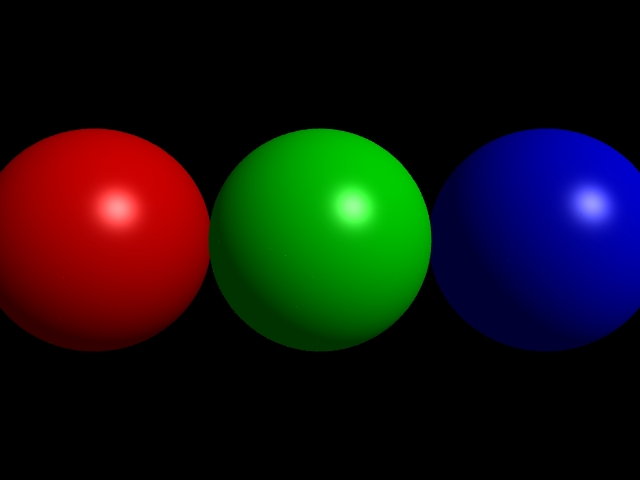
次はtest2.scmで保存します。
$ guile test2.scm
とやることで、sphere2.tifが出力されれば成功です。
Support for function callbacks written in Scheme
Support Scheme RiProcedurals
Type checking for named paramter lists
Support for both immediate rendering and RIB output
A utilities module to provide simple wrapper around RenderMan block structure
https://github.com/tcolgate/guile-rman
インストール方法いろいろ試してみました。
32ビットLinuxで動作します。
Aqsisは1.6.0
gnu guile2.0.9(最低2.0.0で動きます。)
guile-lib0.2.2(最低0.2.0で動きます。)
■Windows7 64bitにVirtualBoxを入れ、CentOS6.3 i686上で動作確認しました。
●準備
Aqsis1.6をインストールします。
リポジトリにEPELを設定するとしAqsis1.6があります。
http://www.tooyama.org/yum-addrepo-epel.html
を参考にEPELを設定します。
管理者で
#yum --enablerepo=epel search aqsis
で探します。
============================== N/S Matched: aqsis ==============================
aqsis-core.i686 : Command-line tools for Aqsis Renderer
aqsis-data.noarch : Example content for Aqsis Renderer
aqsis-devel.i686 : Development files for Aqsis Renderer
aqsis-libs.i686 : Library files for Aqsis Renderer
aqsis.i686 : Open source 3D rendering solution adhering to the RenderMan: standard
と出てきたら、
yum --enablerepo=epel install aqsis-devel.i686
をインストールすると関連ファイルも含めて全部入れてくれます。
●guile-rman関連のインストール
1. SWIGをインストールします。swig-2.0.11をダウンロードし
$ ./configure
$ make
# make install
します。
CentOSのSWIGは1.3と古いので入れていたら削除します。
2. gnu guile2.0.9をダウンロードします。
https://www.gnu.org/software/guile/download.html
$./configure
うまく行かない場合は、指示を見て
以下のツールをあらかじめインストールします。
readline-devel
texinfo
ltdl-devel
gmp-devel
libunistring-devel
libffi-devel
gc-devel
gc
PCRE-devel
入れたら
$ ./configure
$ make
とても時間がかかります。
管理者になって
# make install
/usr/local/binにインストールされます。
アンインストールは
# make uninstall
でできます。
3. guile-lib0.2.2をダウンロードします。
http://www.nongnu.org/guile-lib/download/
$ ./configure
$ make
管理者になって
# make install
アンインストールは
# make uninstall
でできます。
4. guile-rman のインストール
$ sh autogen.sh
$ ./configure
以上を行います。
guile-rman-master/src/Makefileを以下のように変更。
-I/usr/local/include/aqsisを
-I/usr/include/aqsis
-I/usr/local/includeを
-I/usr/local/include/guile/2.0
rispec.iを以下のように変更。
includeで検索し、
4行目ri.h
ri/ri.h
5行目rif.h
ri/rif.h
107行目ri_types.h
ri/ritypes.h
308行目aqsis/config.h
config.h
309行目ri.h
ri/ri.h
310行目rif.h
ri/rif.h
313行目ri.inl
ri/ri.inl
$ make
をします。
うまく行かない場合。
$ make 2>&1 | tee make.log
を使ってエラー確認、make.logをのぞいて確認すると良いです。
無事makeできたら、
管理者になって
# make install
アンインストールは
# make uninstall
でできます。
以下のサンプルを試してみましょう。simple.scmとして保存します。
#!/usr/bin/guile -s

!#


(use-modules (rman rispec))

(use-modules (rman utilities))


(RiBegin "simple.rib")

  (RiDisplay "simple.tif" "file" "rgb")

  (RiFormat 640 480 1)

  (RiProjection "perspective" '("fov" 30))

  (RiTranslate 0 0 5)

;  (RiProgressHandler progress)

  (RiPixelFilter RiBoxFilter 1 1)

  (RiWorldBegin)

      (RiLightSource "ambientlight" (list "intensity" 0.2))

      (RiLightSource "distantlight" (list "intensity" 1.2 ))

      (RiAttributeBegin)

      (RiColor (Color 1.0 0.6 0.0))

      (RiSurface "plastic")

      (RiTransformBegin)

      (RiRotate 90 1 0 0)

      (RiSphere 1 -1 1 360)

      (RiTransformEnd)

      (RiAttributeEnd)

  (RiWorldEnd)

(RiEnd)
$ guile simple.scm
と実行することで、simple.tifが出力されれば成功です。

次はtest2.scmで保存します。
#!/usr/bin/guile -s

!#


(use-modules (rman rispec))

(use-modules (rman utilities))


(RiBegin "test2.rib")

  (RiDisplay "sphere2.tif" "file" "rgb")

  (RiFormat 640 480 1)

  (RiProjection "perspective" '("fov" 40.0))

  (RiTranslate 0 0 6)

;  (RiProgressHandler progress)

  (RiPixelFilter RiBoxFilter 1 1)

  (RiWorldBegin)

    (let ((o1 (Object (RiSphere 1 -1 1 360))))

      (RiLightSource "ambientlight" (list "intensity" 0.2))

      (RiLightSource "distantlight" (list "intensity" 1.2

                                        "uniform point from"  (Point 3 3 -3)))

      (RiColor (Color 1.0 0.0 0.0))

      (RiSurface "plastic")

      (RiTranslate -2.0 0 0)

      (RiObjectInstance o1)

      (RiColor (Color 0.0 1.0 0.0))

      (RiSurface "plastic")

      (RiTranslate 2.0 0 0)

      (RiObjectInstance o1)

      (RiColor (Color 0.0 0.0 1.0))

      (RiSurface "plastic")

      (RiTranslate 2.0 0 0)

      (RiObjectInstance o1))

  (RiWorldEnd)

(RiEnd)
$ guile test2.scm
とやることで、sphere2.tifが出力されれば成功です。

- -
- -
