Processing(プロセッシング)からSunflowへ
- Sunflow
- by yuichirou yokomakura
- 2012.01.03 Tuesday 19:39
ビジュアルデザイン用プログラミング言語Processing(プロセッシング)からSunflowへつなげるライブラリとしてP5Sunflow(http://hipstersinc.com/p5sunflow/)があるが、Processing1.2.1や1.5.1には対応していなかった。
新たに検索したら、
joons-renderer Brings Sunflow's ray-tracing to Processingがあった。
http://code.google.com/p/joons-renderer/
インストールは、
joons_070.zipを解凍する。
解凍したjoonsフォルダごと
Processing1.5.1の以下の場所へコピーする。
C:\processing-1.5.1\modes\java\libraries
Processingを起動し、メニュー「Sketch」→「Import Library...」→joonsが入っていればインストール完了です。
以下のスクリプトをProcessingにコピペします。
Save Asで保存します。
ここではtest01と名付けたとします。
Sunflowのscシーンファイルambient.scをjoonsのダウンロードサイトからコピーしておきます。
ambient.scをマイドキュメントフォルダのprocessingフォルダのtest01フォルダに移動させます。
実行ボタンを押すと、スケッチが出ます。
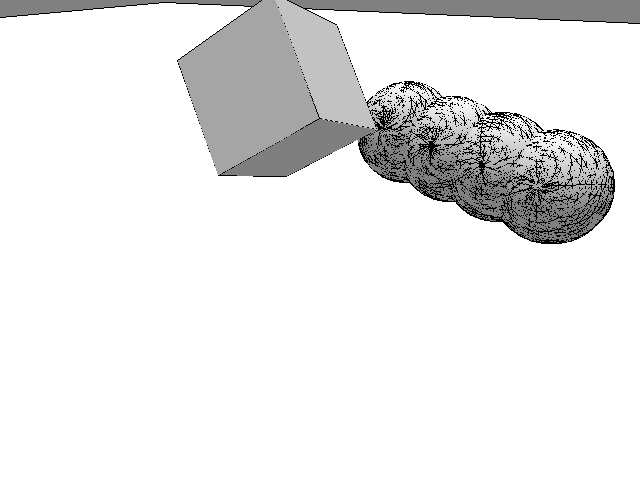
続いてキーボードからrキーを押すとレンダリングされます。
noSmooth(); がオブジェクトを分離します。Sphereは別です。
いろいろといじってみます。ありがとうございます。
新たに検索したら、
joons-renderer Brings Sunflow's ray-tracing to Processingがあった。
http://code.google.com/p/joons-renderer/
インストールは、
joons_070.zipを解凍する。
解凍したjoonsフォルダごと
Processing1.5.1の以下の場所へコピーする。
C:\processing-1.5.1\modes\java\libraries
Processingを起動し、メニュー「Sketch」→「Import Library...」→joonsが入っていればインストール完了です。
以下のスクリプトをProcessingにコピペします。
Save Asで保存します。
ここではtest01と名付けたとします。
import joons.*;


JoonsRenderer jr;

boolean rendered = false;


float eyeX = 50;

float eyeY = 90;

float eyeZ = 50;

float centerX = 0;

float centerY = 0;

float centerZ = 0;

float upX = 0;

float upY = 0;

float upZ = -1;

float fov = PI / 4;

float aspect = (float) 1.3333;

float zNear = 5;

float zFar = 10000;


public void setup() {

   size(640, 480, P3D);

   jr = new JoonsRenderer(this,width,height);

   jr.addAfterShader("shader {");

   jr.addAfterShader("   name Green");

   jr.addAfterShader("   type shiny");

   jr.addAfterShader("   diff 0.25 0.8 0.25");

   jr.addAfterShader("   refl 0.25");

   jr.addAfterShader("}");

   jr.addAfterShader("shader {");

   jr.addAfterShader("   name blueshiny");

   jr.addAfterShader("   type shiny");

   jr.addAfterShader("   diff 0.2 0.4 0.75");

   jr.addAfterShader("   refl 0.25");

   jr.addAfterShader("}");

}


public void draw() {

   background(128);

   lights();

   fill(255);


   beginRecord("joons.OBJWriter","");//leave the second parameter as "".


   perspective(fov, aspect, zNear, zFar);//use perspective() before camera()!!

   camera(eyeX, eyeY, eyeZ, centerX, centerY, centerZ, upX, upY, upZ);


   rect(-500,-500,1000,1000);//the floor plane


   noSmooth(); //In my library, noSmooth() is used to separate one object from another.


   translate(0,-20,20);

   rotateX((float) 0.3);

   rotateY((float) 0.2);

   rotateZ((float) 0.1);


   translate(10,0);

   sphere(10);

   translate(10,0);

   sphere(10);

   translate(10,0);

   sphere(10);

   translate(10,0);

   sphere(10);

   translate(-40,30);

   rotateZ((float)1.5);

   rotateX((float) 0.8);

   box(20);


   endRecord();


   if(rendered)

     jr.display();

}


public void keyPressed() {

   if (key == 'r' || key == 'R' && !rendered) {

     saveFrame("capture.png");

     jr.setShader("sphere0","Green");

     jr.setShader("sphere1","blueshiny");

     jr.setShader("sphere2","Green");

     jr.setShader("sphere3","blueshiny");

     jr.setShader("object1","Red");

     jr.setSC("ambient.sc");

     rendered=jr.render("bucket");

 }

}
Sunflowのscシーンファイルambient.scをjoonsのダウンロードサイトからコピーしておきます。
ambient.scをマイドキュメントフォルダのprocessingフォルダのtest01フォルダに移動させます。
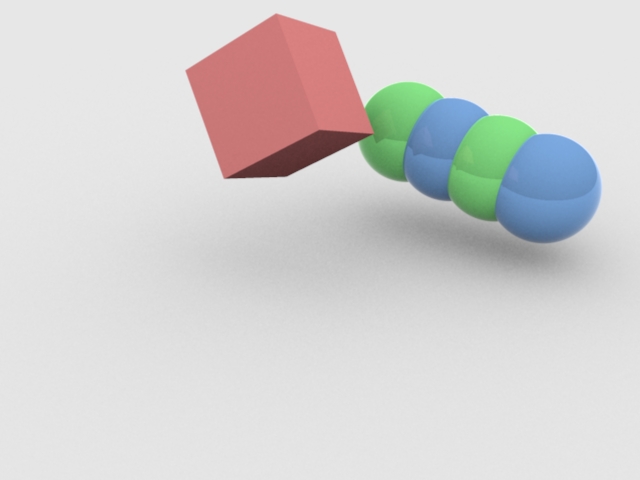
実行ボタンを押すと、スケッチが出ます。
続いてキーボードからrキーを押すとレンダリングされます。
noSmooth(); がオブジェクトを分離します。Sphereは別です。
いろいろといじってみます。ありがとうございます。
- -
- -