2018/10/22記述
2020/5/12更新
LightflowのC APIについて、動いたLinux distributionを調べました。
Fedora28(64bit)をインストールしたノートパソコン(2012年 W255HPW)にVirtualBox5.2.20をインストール。
32bitのLinuxをいくつかインストールしました。
Lightflow C APIが動いたのは、
VineLinux2.6(include python1.5, gcc2.95)
VineLinux3.2
VineLinux4.0
VineLinux4.2
VineLinux5.2
CentOS5.11
ここまで、画面が800*600で狭いのが難点。
Fedora32(64bit)にGnome Boxesを入れ、
Fedora-8-i386をインストール。
python1.5,gcc2.95,Lightflow動きました。
Lightflow C APIも動きました。
Linuxは、gccが4.1.2のディトりビューションが良いみたいです。2020/5/12追記
動かなかったのは、
Scientific Linux6 i386
Fedora28 32bit
//** インストール方法
http://www.python.org/download/releases/1.5/
Python 1.5.2 sources (2.5 MB)をダウンロード
■python1.5.2をインストール。
$ ./configure
$ make
# make altinstall
■さらに次のファイルをダウンロードします。
compat-libstdc++-6.2-2.9.0.14.i386.rpm
http://rpm.pbone.net/index.php3/stat/4/idpl/14760/com/compat-libstdc++-6.2-2.9.0.14.i386.rpm.html
■gcc-2.95.3をインストール。
インストール先のディレクトリを作成しておく。
# mkdir /usr/local/gcc-2.95
$ ./configure --prefix=/usr/local/gcc-2.95 --enable-languages=c,c++
$ make
# make install
確認
$ /usr/local/gcc-2.95/bin/g++ --version
2.95.3
■Lightflowのダウンロード
Lightflowのサイトから
http://www.lightflowtech.com/
Linux RedHat 6.1 Version (1608 Kb)
lf_redhat.tgzをダウンロードします。
/home/ユーザ/Lightflow
で解凍します。
.bash_profileまたは.bashrcに記入
LD_LIBRARY_PATH=$LD_LIBRARY_PATH:$HOME/Lightflow
PYTHONPATH=$PYTHONPATH:$HOME/Lightflow
LIGHTFLOWPATH=$HOME/Lightflow
LIGHTFLOW_SE_MEMORY=32000
LIGHTFLOW_VE_MEMORY=32000
export LD_LIBRARY_PATH PYTHONPATH LIGHTFLOWPATH LIGHTFLOW_SE_MEMORY LIGHTFLOW_VE_MEMORY
以下を実行するとpython1.5でレンダリングできました。
Examples]$ python1.5 ball1.py
■C APIの設定。
http://www.knoerig.de/lightflow_en.html
「Rudi's Homepage - Lightflow」を参考にincludeファイルをダウンロードします。
$ mkdir simplescene
includeファイルを置きます。
C++-libraryをシンボリックリンクします。
# ln -s /home/ユーザ/Lightflow/libLightflow.so /usr/lib
以下Makefile
CC = /usr/local/gcc-2.95/bin/g++

INCLUDE=-I ./include

LNK = -lLightflow

CNV = convert


all: ball.jpg


ball.jpg: ball.tga

	$(CNV) ball.tga ball.jpg


ball.tga: simplescene

	simplescene


simplescene: main.cpp

	$(CC) $(INCLUDE) $(LNK) main.cpp -o simplescene
main.cpp
#include < Lightflow/LfLocalSceneProxy.h >

#include


int main()

{

    // create a new proxy

    LfLocalSceneProxy *s = new LfLocalSceneProxy();

    // this is a container object for storing the arguments passed to

    // the renderer via the proxy

    LfArgList list;


    // define a light

    list.Reset();

    list << "position" << LfVector3(-4,-7,6);

    list << "color" << LfVector3(450*1.0,450*1.0,450*0.8);

    LfInt light = s->NewLight("soft",list);

    s->LightOn(light);


    // define a material (standard material, there are others)

    list.Reset();

    // ambient color

    list << "ka" << LfColor(0,0,0.5);

    // reflection color

    list << "kc" << LfColor(1,0.5,0.5);

    // diffuse reflection factor

    list << "kd" << 0.5;

    // specular reflection smoothness (0-polished,1-plastic)

    list << "km" << 0.1;

    // surface displacement

    // LfInt is a long int representing a handle

    LfInt plastic = s->NewMaterial("standard",list);


    // define a sphere object

    s->MaterialBegin(plastic);

    list.Reset();

    list << "radius" << 1.0;

    LfInt ball = s->NewObject("sphere",list);

    s->AddObject(ball);

    s->MaterialEnd();


    // specify the output object

    list.Reset();

    list << "file" << "ball.tga";

    LfInt saver = s->NewImager("tga-saver",list);


    // specify the rendering context

    s->ImagerBegin(saver);

    list.Reset();

    // camera position

    list << "eye" << LfPoint(0,-4,0);

    // point to aim at

    list << "aim" << LfPoint(0,0,0);

    LfInt camera = s->NewCamera("pinhole",list);

    s->ImagerEnd();


    // start rendering

    s->Render(camera,300,300);


    delete s;

    return 0;

}
一時的にPATHを通しても良いです。
$ export PATH=/usr/local/gcc-2.95/bin:$PATH
makeします。
$ make simplescene
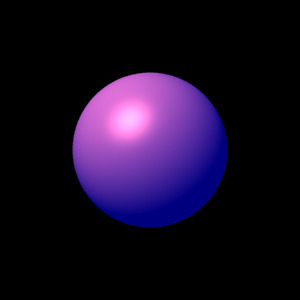
$ ./simplescene
Lightflow Rendering Tools
Copyright (c) 1995-2000 by Jacopo Pantaleoni. All rights reserved
Pinhole Camera On
Objects : 1
LfSoftLight::Init()
00:00:00 - cell 418176 / 418176
Rendering 300 x 300 pixels
00:00:00 - 87.1%
$ convert ball.tga ball.jpg
$ eog ball.jpg
Lightflowを設定していくことで、Linuxの勉強になりました。
ありがとうございます。