Rendering学習日記

日々、3DCGの世界は進歩しています。勉強して理解したことをまとめていきます。RenderMan互換レンダラーやグローバル・イルミネーション。いろんなことに好奇心を持って、面白くなる。目指せShader書き!!
ありがとうございます。

PythonからRenderMan その3

イギリスのbournemouth universityを参考にしました。ありがとうございます。Thank you.
RenderManProServer-14からついているimport prmanを利用してます。
cubeを作成しました。
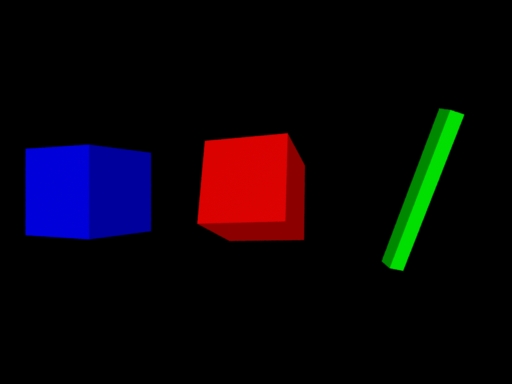
cube_pr.jpg
#cube_pr.py
#set PYTHONPATH=C:\Python25;C:\Python\Scripts;%RMANTREE%\bin
import getpass
import time
# import the python renderman library
import prman

def Cube(width,height,depth) :
w=width/2.0
h=height/2.0
d=depth/2.0
ri.ArchiveRecord(ri.COMMENT, 'Cube Generated by Cube Function')
#rear
face=[-w,-h,d,-w,h,d,w,-h,d,w,h,d]
ri.Patch("bilinear",{'P':face})
#front
face=[-w,-h,-d,-w,h,-d,w,-h,-d,w,h,-d]
ri.Patch("bilinear",{'P':face})
#left
face=[-w,-h,-d,-w,h,-d,-w,-h,d,-w,h,d]
ri.Patch("bilinear",{'P':face})
#right
face=[w,-h,-d,w,h,-d,w,-h,d,w,h,d]
ri.Patch("bilinear",{'P':face})
#bottom
face=[w,-h,d,w,-h,-d,-w,-h,d,-w,-h,-d]
ri.Patch("bilinear",{'P':face})
#top
face=[w,h,d,w,h,-d,-w,h,d,-w,h,-d]
ri.Patch("bilinear",{'P':face})
ri.ArchiveRecord(ri.COMMENT, '--End of Cube Function--')


ri = prman.Ri() # create an instance of the RenderMan interface
ri.Option("rib", {"string asciistyle": "indented"})

filename = "Cube.rib"
# this is the begining of the rib archive generation we can only
# make RI calls after this function else we get a core dump
ri.Begin("__render") #filename)
# ArchiveRecord is used to add elements to the rib stream in this case comments
# note the function is overloaded so we can concatinate output
ri.ArchiveRecord(ri.COMMENT, 'File ' +filename)
ri.ArchiveRecord(ri.COMMENT, "Created by " + getpass.getuser())
ri.ArchiveRecord(ri.COMMENT, "Creation Date: " +time.ctime(time.time()))

# now we add the display element using the usual elements
# FILENAME DISPLAY Type Output format
ri.Display("cube_pr.png", "file", "rgb")
ri.Format(512, 384, -1.0)
ri.PixelSamples( 4, 4)
ri.ShadingRate(1)
# now set the projection to perspective
ri.Projection(ri.PERSPECTIVE,{ri.FOV:50})

# now we start our world
ri.WorldBegin()
ri.LightSource("distantlight", {ri.HANDLEID: "1","to":[0,0,1]})
ri.LightSource("ambientlight", {ri.HANDLEID: "2", "intensity":[0.4]})

ri.Surface("plastic")
ri.Translate(0,0,5)

ri.TransformBegin()
ri.Translate(-2,0,0)
ri.Rotate(25,0,1,0)
ri.Color([0,0,1])
Cube(1,1,1)
ri.TransformEnd()

ri.TransformBegin()
ri.Translate( 0,0,0)
ri.Rotate( 25,1,1,0)
ri.Color([1,0,0])
Cube(1,1,1)
ri.TransformEnd()

ri.TransformBegin()
ri.Translate(2,0,0)
ri.Rotate(-25,1,1,1)
ri.Color([0,1,0])
Cube(0.2,2,0.2);
ri.TransformEnd()

ri.WorldEnd()
ri.End()
  • -
  • -

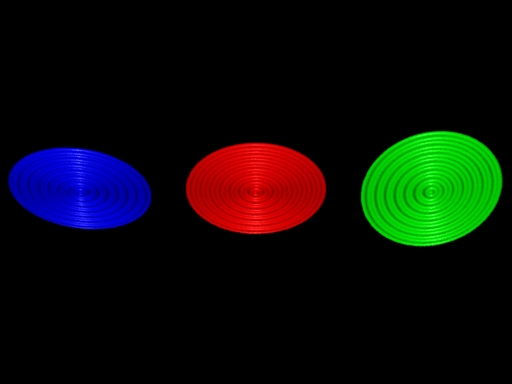
PythonからRenderMan その4

イギリスのbournemouth universityを参考にしてます。ありがとうございます。Thank You.
RenderManProServer-14からついているimport prmanを利用します。
InlineArchive.jpg
#inlinearchive_pr.py
#set PYTHONPATH=C:\Python25;C:\Python\Scripts;%RMANTREE%\bin
import getpass
import time
# import the python renderman library
import prman

ri = prman.Ri() # create an instance of the RenderMan interface
ri.Option("rib", {"string asciistyle": "indented"})

filename = "InlineArchive.rib"

ri.Begin(ri.RENDER)

ri.ArchiveBegin("Wave")
ri.Rotate(90,1,0,0)
ri.Sphere(0.030303,-0.030303,0,360)
ri.Torus(0.0606061,0.030303,0,180,360)
ri.Torus(0.121212,0.030303,180,360,360)
ri.Torus(0.181818,0.030303,0,180,360)
ri.Torus(0.242424,0.030303,180,360,360)
ri.Torus(0.30303,0.030303,0,180,360)
ri.Torus(0.363636,0.030303,180,360,360)
ri.Torus(0.424242,0.030303,0,180,360)
ri.Torus(0.484848,0.030303,180,360,360)
ri.Torus(0.545455,0.030303,0,180,360)
ri.Torus(0.606061,0.030303,180,360,360)
ri.Torus(0.666667,0.030303,0,180,360)
ri.Torus(0.727273,0.030303,180,360,360)
ri.Torus(0.787879,0.030303,0,180,360)
ri.Torus(0.848485,0.030303,180,360,360)
ri.ArchiveEnd()

#ArchiveRecord is used to add elements to the rib stream in this case comments
# note the function is overloaded so we can concatinate output
ri.ArchiveRecord(ri.COMMENT, 'File ' +filename)
ri.ArchiveRecord(ri.COMMENT, "Created by " + getpass.getuser())
ri.ArchiveRecord(ri.COMMENT, "Creation Date: " +time.ctime(time.time()))

# now we add the display element using the usual elements
# FILENAME DISPLAY Type Output format
ri.Display("InlineArchive.png", "file", "rgb")
ri.Format(512, 384, -1.0)
ri.Projection(ri.PERSPECTIVE,{ri.FOV:30})

# now we start our world
colours ={
"red":[1,0,0],
"white":[1,1,1],
"green":[0,1,0],
"blue":[0,0,1],
"black":[0,0,0],
"yellow":[1,1,0]
}

# start our world
ri.WorldBegin()
ri.LightSource("distantlight", {ri.HANDLEID: "1","to":[0,0,1]})
ri.LightSource("ambientlight", {ri.HANDLEID: "2", "intensity":[0.4]})

ri.Translate(0,0,9) #move the global view position
ri.Surface("plastic")

ri.TransformBegin()
ri.Rotate(40,1,0,0)
ri.Color(colours["red"])
ri.Attribute ("identifier",{"name": "Wave1"})
ri.ReadArchive("Wave")
ri.TransformEnd()

ri.TransformBegin()
ri.Rotate(55,1,0,0)
ri.Color(colours["green"])
ri.Translate(2.2,0,0)
ri.Attribute( "identifier",{ "name" :"Wave2"})
ri.ReadArchive("Wave")
ri.TransformEnd()

ri.TransformBegin()
ri.Rotate(35,1,0,0)
ri.Color(colours["blue"])
ri.Translate(-2.2,0,0)
ri.Attribute("identifier",{ "name" : "Wave3"})
ri.ReadArchive("Wave")
ri.TransformEnd()
#end our world

ri.WorldEnd()
ri.End()
  • -
  • -

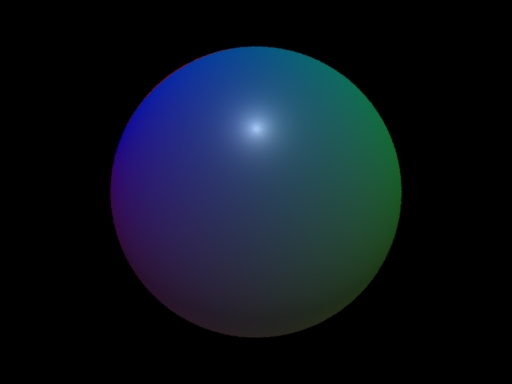
PythonからRenderMan その5

引き続き、イギリスのbournemouth universityを参考にしてます。ありがとうございます。勉強になります。Csを球にセットしてます。
RenderManProServer-14からついているimport prmanを利用します。
Param.jpg
#param_pr.py
#set PYTHONPATH=C:\Python25;C:\Python\Scripts;%RMANTREE%\bin
import getpass
import time
# import the python renderman library
import prman

ri = prman.Ri() # create an instance of the RenderMan interface
ri.Option("rib", {"string asciistyle": "indented"})

filename = "Param.rib"
ri.Begin(ri.RENDER)
# ArchiveRecord is used to add elements to the rib stream in this case comments
# note the function is overloaded so we can concatinate output
ri.ArchiveRecord(ri.COMMENT, 'File ' +filename)
ri.ArchiveRecord(ri.COMMENT, "Created by " + getpass.getuser())
ri.ArchiveRecord(ri.COMMENT, "Creation Date: " +time.ctime(time.time()))

# now we add the display element using the usual elements
# FILENAME DISPLAY Type Output format
ri.Display("Param.png", "file", "rgb")
ri.Format(512, 384, -1.0)
# now set the projection to perspective
ri.Projection(ri.PERSPECTIVE,{ri.FOV:50})

# now we start our world
ri.WorldBegin()
ri.LightSource("distantlight", {ri.HANDLEID: "1","to":[0,-1,1]})
ri.LightSource("ambientlight", {ri.HANDLEID: "2", "intensity":[0.4]})

ri.Translate(0,0,3)
ri.TransformBegin()
colours=[1,0,0,0,0,1,1,0,0,0,1,0]
ri.Rotate(90,1,1,1)
ri.Surface("plastic")
ri.Sphere(1,-1,1,360,{"Cs":colours})
ri.TransformEnd()
ri.WorldEnd()
ri.End()
  • -
  • -
<< 20/50 >>