MacRenderManへの出力
- RenderMan
- by yuichirou yokomakura
- 2010.01.10 Sunday 10:16
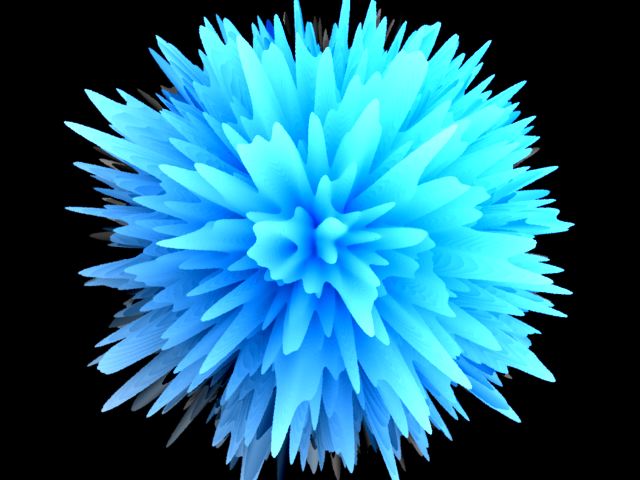
Presenter3Dへ3DMF形式で作ったモデルをインポートしてみた。
変換には、LilyEightを利用。
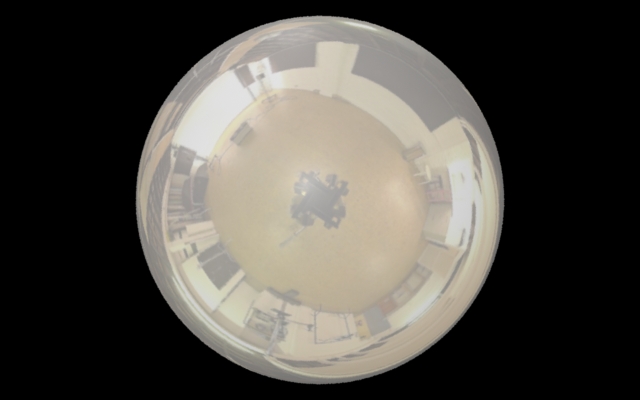
しかしながらPresenter3Dで出力したShadowMap生成が今ひとつ、
原因がつかめなくていろいろと実験してみた。
影がうまく出てこない。
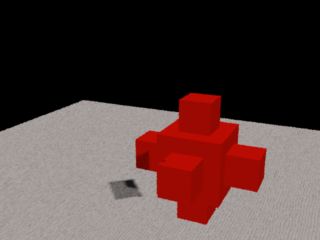
原因は
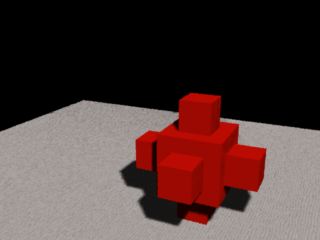
■当初はshadowdistantを外して、shadowspotに変更して、レンダリングしてみた。
しかしながら、モアレがひどい。シャドーマップ生成の解像度をあげてみた。
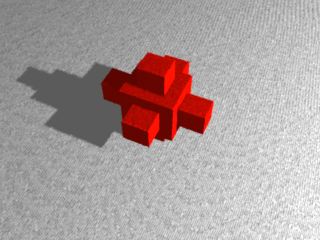
まだ、出てしまうので4096×4096まであげてみた。
これでも、何か変だった。
原因を探ってみたら、RIB内のOption "shadow" "bias0"の記述をコメントアウトしていなかったためだ。
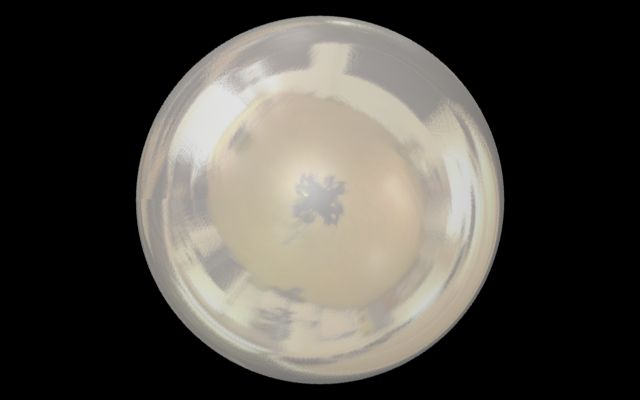
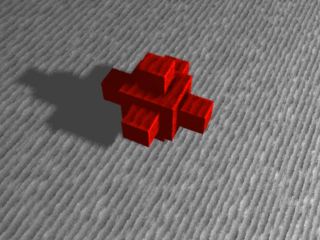
やっときれいにできたところだ。MacRenderMan面白いです。

Presenter3Dでいろいろ設定し、いじって、出力したRIBをさらにカスタマイズしていくのは大変ですが、出来上がる画像がよくなっていくのが楽しいです。Windowsマシンでレンダリングした方が速いですね。
ありがとうございます。
変換には、LilyEightを利用。
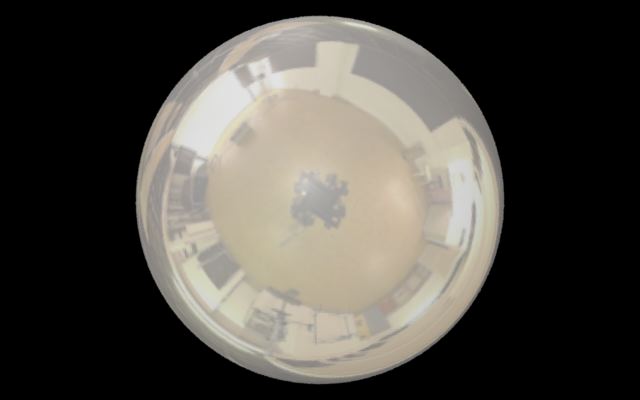
しかしながらPresenter3Dで出力したShadowMap生成が今ひとつ、
原因がつかめなくていろいろと実験してみた。
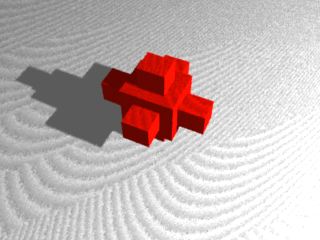
影がうまく出てこない。
原因は
- ShadowPass部分の最初のProjection "orthographic"となっているところを"perspective" "fov" 35とイメージ生成と同じにした。
- Option "shadow" "bias0" [0.018]など2行を#でコメントアウトした。
■当初はshadowdistantを外して、shadowspotに変更して、レンダリングしてみた。
しかしながら、モアレがひどい。シャドーマップ生成の解像度をあげてみた。
まだ、出てしまうので4096×4096まであげてみた。
これでも、何か変だった。
原因を探ってみたら、RIB内のOption "shadow" "bias0"の記述をコメントアウトしていなかったためだ。
やっときれいにできたところだ。MacRenderMan面白いです。
Presenter3Dでいろいろ設定し、いじって、出力したRIBをさらにカスタマイズしていくのは大変ですが、出来上がる画像がよくなっていくのが楽しいです。Windowsマシンでレンダリングした方が速いですね。
ありがとうございます。
- -
- -