<< 13/15 >>
import prmanでのsearchpath
ri.Begin()の後にOptionのsearchpathは書かないとだめ。
てっきり前に書くもんだと思い込み。
A00002 {WARNING} Unknown unqualified RiOption context: searchpath.
以下は、参考スクリプト
# set PYTHONPATH=C:\Python25;C:\Python25\Scripts;%RMANTREE%\bin # this is where prman.py lives
import prman
ri = prman.Ri() # create an instance of the RenderMan interface
rendertarget = "helloworld.rib"
ri.Option("rib", {"string asciistyle": "indented"})
ri.Begin(ri.RENDER) # set rendertarget to ri.RENDER to render pixels
ri.Option("ribparse", {"string varsubst":["$"]})
ri.Option("searchpath", {"string shader": "RC:&"})
#ri.Imager ("background", {"color color":(.2, .4, .6)})
ri.Display("teapot4.png", "framebuffer", "rgb")
ri.Format(512,480,1)
ri.Projection(ri.PERSPECTIVE, {ri.FOV: 45}) # standard Ri tokens are available
ri.ShadingRate(0.25)
#ri.Translate(0,0,10)
ri.Rotate(-33.69, 1.00, 0.00, 0.00)
ri.Translate(0.00, -4.00, 8)
ri.WorldBegin()
ri.LightSource("shadowdistant",{ri.HANDLEID:"2", "from": [ -10, 10, -10], "to": [ 0, 0, 0], "intensity":[2.0], "string shadowname": ["raytrace"]})
#ri.LightSource( "pointlight",{ri.HANDLEID:"1","from": [-10, 10, -10], "intensity" :[300]})
#ri.LightSource( "pointlight",{ri.HANDLEID:"2","from": [10, 10, -10], "intensity" :[300]})
#ri.LightSource( "pointlight",{ri.HANDLEID:"3","from": [-10, -10, -10], "intensity" :[300]})
ri.AttributeBegin()
size=20.0
ri.Attribute( "visibility", {"trace": [1]})
ri.Attribute( "visibility", {"int transmission": [0]})
ri.TransformBegin()
ri.Color(( .2773, .2855, .6679))
ri.Surface( "DPCloudPlane")
ri.Sphere(size, -size, size,360)
ri.TransformEnd()
ri.AttributeEnd()
ri.AttributeBegin()
ri.Attribute( "visibility", {"trace": [0]})
ri.Attribute( "visibility", {"int transmission": [1]})
ri.TransformBegin()
ri.Color(( 0.9, 0.9, 0.9))
ri.Surface( "shinymetal", {"string texturename": ["raytrace"]})
#ri.Translate( 1, 0, 0)
ri.Translate( -1, -2, 0)
ri.Rotate( -90, 1, 0, 0)
ri.Geometry("teapot")
ri.TransformEnd()
ri.AttributeEnd()
ri.AttributeBegin()
size=1.0
ri.Attribute( "visibility", {"trace": [1]})
ri.Attribute( "visibility", {"int transmission": [1]})
ri.TransformBegin()
ri.Color(( 1, 0.1, 0))
ri.Surface( "plastic")
ri.Translate( 1, -1, -3)
ri.Rotate( -90, 1, 0, 0)
ri.Sphere(size, -size, size,360)
ri.TransformEnd()
ri.AttributeEnd()
ri.AttributeBegin()
ri.Attribute( "visibility", {"trace": [1]})
ri.Attribute( "visibility", {"int transmission": [1]})
ri.TransformBegin()
face=[-5,-2,-5, 5,-2,-5,-5,-2,5, 5,-2,5]
ri.Color(( 0.99, 0.99, 0.99))
#ri.Surface( "checker", {"float Kd":[0.5],"float Ka":[0.1], "float frequency":[6.0], "color blackcolor":[0.2,0.8,0.5]})
ri.Surface( "blue_marble")
ri.Patch("bilinear",{'P':face})
ri.TransformEnd()
ri.AttributeEnd()
ri.WorldEnd()
ri.End()
TypeError: 'module' object is not callable
別ディレクトリのクラス呼び出しのエラー。
TypeError: 'module' object is not callable
##############
import sys
sys.path.append("C:\prman_sample\lighting\PythonClasses")
from Camera import Camera
from vector import Vector
import prman
・・・・
CameraクラスがあるPythonClassesまでパスを追加しておき、
モジュールの名前.対象のクラス
で呼び出す。
Pythonでは、パッケージ=ディレクトリ、モジュール=ファイルと理解。
・・・
import prman
ri = prman.Ri() # create an instance of the RenderMan interface
rendertarget = "helloworld.rib"
cam=Camera(Vector(0,4,-8,1),Vector(0,0,0,1),Vector(0,1,0,0))
cam.fov=45
ri.Begin(ri.RENDER) # set rendertarget to ri.RENDER to render pixels
ri.Imager ("background", {"color color":(.2, .4, .6)})
ri.Display("teapot3.png", "framebuffer", "rgb")
cam.Format(ri)
#ri.Format(512,480,1)
#ri.Projection(ri.PERSPECTIVE, {ri.FOV: 45}) # standard Ri tokens are available
ri.ShadingRate(0.25)
#ri.Translate(0,0,10)
#ri.Rotate(-33.69, 1.00, 0.00, 0.00)
#ri.Translate(0.00, -4.00, 8)
ri.WorldBegin()
cam.Place(ri)
ri.Scale(-1,1,1)
・・・・
結果が違うのでri.Scale(-1,1,1)を加えた。
Camera(eye, look, up)となっている。
cgkitで確認してみた。
C:\Python26>python
Python 2.6.6 (r266:84297, Aug 24 2010, 18:13:38) [MSC v.1500 64 bit (AMD64)] on win32
Type "help", "copyright", "credits" or "license" for more information.
>>> from cgkit.all import *
>>> V=mat4(1).lookAt(pos=(4,0.2,4),target=(0,0,0),up=(0,1,0))
>>> V
[-0.707107, -0.0249844, -0.706665, 4]
[0, 0.999376, -0.0353333, 0.2]
[0.707107, -0.0249844, -0.706665, 4]
[0, 0, 0, 1]
>>> vt=(V.inverse()).transpose()
>>> vt
[-0.707107, -0.0249844, -0.706665, -0]
[-0, 0.999376, -0.0353333, 0]
[0.707107, -0.0249844, -0.706665, -0]
[-0, 0, 5.66039, 1]
>>>
C81 はじめての参加です。
ビッグサイト
31日土曜日,西,す,29
Rendering学習日記,
ボクのRenderMan自由研究,
オープンソースpython cgkitを利用したRenderManの使い方をPDFにまとめました。
ありがとうございます。
Aqsis Renderer 1.8.2 under CentOS6.2
RenderMan互換レンダラAqsis1.8.2をソースからビルドしてみた。
インストール前に以下を入れておく。
* CMake (v2.6.3+)
* Boost (v1.34.1+)
* libtiff.lib (v3.7.1+)
* flex (v2.5.4) (2.5.31 causes problems, see FAQ 2.2)
* bison (v1.35+)
* Qt (v4.6+) - optional, but required for framebuffer rendering and other GUI components
* libzlib (v1.1.4+)
* libjpeg (v6b+)
* libilmbase (v1.6+)
* OpenEXR - if you want to read and write OpenEXR HDR image files
* doxygen
* sphinx
「ソフトウェアの追加と削除」を使ってインストールするかyum installを使います。
Qt4は、「ソフトウェアの追加と削除」からPyQt4を入れたらまとめて関連パッケージもインストールされた。
aqsis-1.8.2.tar.gzをダウンロードし、ホームフォルダにaqsis-1.8.2フォルダを解凍します。
aqsis-1.8.2]$ mkdir build
aqsis-1.8.2]$ cd build/
build]$ ccmake ../
Press [c] to configure
cキーを押して続けます。
gキーを押して続けます。
build]$ make
build]$ su
管理者になり、
build]$ make install
build]# aqsis -version
aqsis version 1.8.2 (revision 0)
compiled Aug 25 2012 21:33:26
で成功!!
/usr/local/share/aqsis/examples
にサンプルが入っているので
/usr/local/share/aqsis/examples/vase
に入って
vase]$ ./render.sh
レンダリングされます。
書き込み権限がない場合、エラーが出るので、
exampleフォルダをホームフォルダにコピーして実行すると良いです。
以下、
$ cat hoge.rib
##RenderMan RIB
##Creator OX/AL
##CreationDate Thu Oct 25 20:59:31 2012
Display "frame" "framebuffer" "rgba"
WorldBegin
Sphere 1 -1 1 360
WorldEnd
$ aqsis hoge.rib
piqsl: error while loading shared libraries: libQtGui.so.4: cannot open shared object file: No such file or directory
# yum provides libQtGui.so.4
1:qt-x11-4.6.2-24.el6.i686 : Qt GUI-related libraries
Repo : base
Matched from:
Other : libQtGui.so.4
# yum install qt-x11-4.6.2-24.el6.i686
$ aqsis hoge.rib
レンダリングOK
AL the animation language
http://accad.osu.edu/~smay/AL/index.html
Version 5.2a [3/18/02]
LINUX 2.4 (RH 7.1,BMRT 2.6)
Downloading AL
http://accad.osu.edu/~smay/Download/AL5.2a.linux.tar.gz
AL the animation language install under CentOS6.3
Linuxで動くScheme言語をもとに作成された言語ALです。
簡易アニメーションをRenderManに受け渡すことができます。
1998年から2002年まで開発されていたようです。
http://accad.osu.edu/~smay/AL/index.html
■ダウンロード先
Version 5.2a [3/18/02]
LINUX 2.4 (RH 7.1,BMRT 2.6)
Downloading AL
http://accad.osu.edu/~smay/Download/AL5.2a.linux.tar.gz
Index of /dev/3d/bmrt
http://www.raclot.org/dev/3d/bmrt/
以下はホーム(例:makura)に解凍して.bashrcに以下を追加しました。
---------------------------------------
# BMRT
export BMRT=/home/makura/software/bmrt-2.6beta-linux-i386
export SHADERS=$BMRT/shaders
#ALHOME
export ALHOME=/home/makura/AL5.2a
export LD_LIBRARY_PATH=$LD_LIBRARY_PATH:$ALHOME/lib
export PATH=$PATH:$BMRT/bin:$ALHOME/bin
----------------------------------------
以下は、足りないものをインストールしていった過程を提示します。
参考にどうぞ。
[@localhost ~]$ echo $BMRT
/home/makura/software/bmrt-2.6beta-linux-i386
[@localhost ~]$ echo $LD_LIBRARY_PATH
/home/makura/software//3delight-10.0.50/Linux-x86_64/lib:/home/makura/software//3delight-10.0.50/Linux-x86_64/lib:/home/makura/AL5.2a/lib
[@localhost ~]$ cd software/bmrt-2.6beta-linux-i386/examples/
[@localhost examples]$ rendrib -v
rendrib: error while loading shared libraries: libGL.so.1: cannot open shared object file: No such file or directory
[@localhost examples]$ su
パスワード:
[root@localhost examples]# yum provides libGL.so.1
Loaded plugins: fastestmirror, refresh-packagekit, security
Loading mirror speeds from cached hostfile
* base: ftp.iij.ad.jp
* extras: ftp.iij.ad.jp
* updates: ftp.iij.ad.jp
mesa-libGL-7.11-5.el6.i686 : Mesa libGL runtime libraries and DRI drivers
Repo : base
Matched from:
Other : libGL.so.1
[root@localhost examples]# yum install mesa-libGL-7.11-5.el6.i686
================================================================================
Package Arch Version Repository Size
================================================================================
Installing:
mesa-libGL i686 7.11-5.el6 base 161 k
Installing for dependencies:
libXxf86vm i686 1.1.0-1.el6 base 18 k
libdrm i686 2.4.25-2.el6 base 66 k
mesa-dri-drivers i686 7.11-5.el6 base 12 M
Transaction Summary
================================================================================
Install 4 Package(s)
Installed:
mesa-libGL.i686
0:7.11-5.el6
Dependency Installed:
libXxf86vm.i686
0:1.1.0-1.el6
libdrm.i686
0:2.4.25-2.el6
mesa-dri-drivers.i686
0:7.11-5.el6
Complete!
[root@localhost examples]# exit
exit
[@localhost examples]$ rendrib -v
rendrib: error while loading shared libraries: libGLU.so.1: cannot open shared object file: No such file or directory
[@localhost examples]$ su
パスワード:
[root@localhost examples]# yum provides libGLU.so.1
Loaded plugins: fastestmirror, refresh-packagekit, security
Loading mirror speeds from cached hostfile
* base: ftp.iij.ad.jp
* extras: ftp.iij.ad.jp
* updates: ftp.iij.ad.jp
mesa-libGLU-7.11-5.el6.i686 : Mesa libGLU runtime library
Repo : base
Matched from:
Other : libGLU.so.1
[root@localhost examples]# yum install mesa-libGLU-7.11-5.el6.i686
================================================================================
Package Arch Version Repository Size
================================================================================
Installing:
mesa-libGLU i686 7.11-5.el6 base 199 k
Transaction Summary
================================================================================
Install 1 Package(s)
Installed:
mesa-libGLU.i686 0:7.11-5.el6
Complete!
[root@localhost examples]# exit
exit
[@localhost examples]$ rendrib -help
rendrib - Ray tracing / radiosity renderer for RIB files
Blue Moon Rendering Tools 2.6.0.-18 linux
(c) Copyright 1990-2000 Exluna, Inc. and Larry Gritz. All rights reserved.
Usage: rendrib [options] file1 ... fileN
options: -res x y Specify image resolution (if not in RIB)
-samples x y Specify pixel sampling rate (if not in RIB)
-var v min max Specify pixel sampling variance
-frames f1 f2 Specify frame interval
-radio n Perform radiosity calculation with n steps
-crop x1 x2 y1 y2 Set the crop window (screen space units)
-safe Safety of existing files (no overwrite)
-d [interlace] Display override - show in framebuffer
-pos x y Specify image position (for framebuffer display)
-v Verbose mode
-stats Display rendering statistics
-silent Display only error messages
-rayserver Act as a ray server
-beep Ring the terminal bell when finished
-arch Print out the platform architecture code
[@localhost examples]$ rendrib -d cornell.rib
Rendering "cornell.tif" ...
Done computing image.
[@localhost ~]$ cd AL5.2a/
[@localhost AL5.2a]$ ox
ox.motif: error while loading shared libraries: libXt.so.6: cannot open shared object file: No such file or directory
[makura@localhost AL5.2a]$ su
パスワード:
[root@localhost AL5.2a]# yum provides libXt.so.6
Loaded plugins: fastestmirror, refresh-packagekit, security
Loading mirror speeds from cached hostfile
* base: ftp.iij.ad.jp
* extras: ftp.iij.ad.jp
* updates: ftp.iij.ad.jp
libXt-1.0.7-1.el6.i686 : X.Org X11 libXt runtime library
Repo : base
Matched from:
Other : libXt.so.6
[root@localhost AL5.2a]# yum install libXt-1.0.7-1.el6.i686
================================================================================
Package Arch Version Repository Size
================================================================================
Installing:
libXt i686 1.0.7-1.el6 base 168 k
Transaction Summary
================================================================================
Install 1 Package(s)
Installed:
libXt.i686 0:1.0.7-1.el6
Complete!
[root@localhost AL5.2a]# exit
exit
[makura@localhost AL5.2a]$ ox
ox.motif: error while loading shared libraries: libXpm.so.4: cannot open shared object file: No such file or directory
[@localhost AL5.2a]$ su
パスワード:
[root@localhost AL5.2a]# yum provides libXpm.so.4
Loaded plugins: fastestmirror, refresh-packagekit, security
Loading mirror speeds from cached hostfile
* base: ftp.iij.ad.jp
* extras: ftp.iij.ad.jp
* updates: ftp.iij.ad.jp
libXpm-3.5.8-2.el6.i686 : X.Org X11 libXpm runtime library
Repo : base
Matched from:
Other : libXpm.so.4
[root@localhost AL5.2a]# yum install libXpm-3.5.8-2.el6.i686
================================================================================
Package Arch Version Repository Size
================================================================================
Installing:
libXpm i686 3.5.8-2.el6 base 58 k
Transaction Summary
================================================================================
Install 1 Package(s)
Installed:
libXpm.i686 0:3.5.8-2.el6
Complete!
[root@localhost AL5.2a]# exit
exit
[@localhost AL5.2a]$ ox
ox.motif: error while loading shared libraries: libstdc++-libc6.2-2.so.3: cannot open shared object file: No such file or directory
[@localhost AL5.2a]$ su
パスワード:
[root@localhost AL5.2a]# yum provides libstdc++-libc6.2-2.so.3
Loaded plugins: fastestmirror, refresh-packagekit, security
Loading mirror speeds from cached hostfile
* base: ftp.iij.ad.jp
* extras: ftp.iij.ad.jp
* updates: ftp.iij.ad.jp
compat-libstdc++-296-2.96-144.el6.i686 : Compatibility 2.96-RH standard C++
: libraries
Repo : base
Matched from:
Other : libstdc++-libc6.2-2.so.3
[root@localhost AL5.2a]# yum install compat-libstdc++-296-2.96-144.el6.i686
================================================================================
Package Arch Version Repository Size
================================================================================
Installing:
compat-libstdc++-296 i686 2.96-144.el6 base 77 k
Transaction Summary
================================================================================
Install 1 Package(s)
Installed:
compat-libstdc++-296.i686 0:2.96-144.el6
Complete!
[root@localhost AL5.2a]# exit
exit
[@localhost AL5.2a]$ ox
Welcome to OX, version 5.2a [3/18/02]
[Xt/Motif][BMRT][OGRE][Chant]
ox --> (ogre)
#(instance ogre-app #[environment 4133324880])
ox --> (world (sphere))
ox --> (render)
rendering frame: "frame" (rgba) to "framebuffer"
generating RIB for world
rendering world
Rendering "frame" ...
Done computing image.
()
ox --> ^Z
[1]+ 停止 ox
■補足
xorg-x11-fonts-75dpi.noarchとxorg-x11-fonts-ISO8859-1-75dpi.noarch、2つのフォントをインストールしておくと、アニメーション・カーブ・エディタchantが動く。
Pythonを使ってRenderManを操る その1
とりあえず、サンプルを参考にカメラをテストしました。
イギリスのbournemouth universityを参考にしました。ありがとうございます。Thank you.
#!/usr/bin/python
# set PYTHONPATH=C:\Python25;C:\Python25\Scripts;%RMANTREE%\bin
import sys
sys.path.append("D:\lighting\PythonClasses")
import math
import getpass
import time,random
# import the python renderman library
import prman
from vector import Vector
from Camera import *
def Scene(ri) :
ri.AttributeBegin()
random.seed(25)
face=[-0.1,-1,-3, 0.1,-1,-3,-0.1,-1,3, 0.1,-1,3]
plank=-5.0
while (plank <=5.0) :
ri.TransformBegin()
ri.Color([random.uniform(0.35,0.4),random.uniform(0.1,0.025),0])
c0=[random.uniform(-10,10),random.uniform(-10,10),random.uniform(-10,10)]
c1=[random.uniform(-10,10),random.uniform(-10,10),random.uniform(-10,10)]
ri.Surface("wood",{"Ks":[0.1],"point c0":c0,"point c1":c1,"float grain":random.randint(2,20)})
ri.Translate(plank,0,0)
ri.Patch("bilinear",{'P':face})
ri.TransformEnd()
plank=plank+0.206
ri.AttributeEnd()
ri.TransformBegin()
ri.AttributeBegin()
ri.Attribute( "visibility", {"trace": [1]})
ri.Attribute( "visibility", {"int transmission": [1]})
ri.Color([0.2,0.4,0.75])
ri.Translate( 0,-1.0,0)
ri.Rotate(-90,1,0,0)
ri.Rotate(36,0,0,1)
ri.Scale(0.4,0.4,0.4)
ri.Surface("plastic")
ri.Geometry("teapot")
ri.AttributeEnd()
ri.TransformEnd()
ri = prman.Ri() # create an instance of the RenderMan interface
#cam=Camera(Vector(4,0.2,4,1),Vector(0,0,0,1),Vector(0,1,0,0))
cam=Camera(Vector(0,2,4,1),Vector(0,0,0,1),Vector(0,1,0,0))
cam.fov=40
#filename = "Camera.rib"
filename = "__render"
ri.Begin(filename)
#ri.Begin(ri.RENDER)
ri.Declare("Light1" ,"string")
ri.Declare("Light2" ,"string")
ri.Declare("Light3" ,"string")
# now we add the display element using the usual elements
# FILENAME DISPLAY Type Output format
#ri.Display("Camera.exr", "framebuffer", "rgba")
ri.Display("Camera.png", "file", "rgb")
cam.Format(ri)
# now we start our world
ri.WorldBegin()
ri.LightSource("shadowdistant",{ri.HANDLEID:"Light1", "from": [ -10, 10, -10], "to": [ 0, 0, 0], "intensity":[2.0], "string shadowname": ["raytrace"]})
#ri.LightSource( "pointlight", {ri.HANDLEID:"Light1", "point from":[-2,2,4], "float intensity": [50]})
ri.LightSource( "distantlight", {ri.HANDLEID:"Light2", "point to":[-1,-0.03,0], "float intensity": [1]})
ri.LightSource( "distantlight", {ri.HANDLEID:"Light3", "point to":[0,-0.5,-1], "float intensity": [0.2]})
ri.Illuminate("Light1",1)
ri.Illuminate("Light2",1)
ri.Illuminate("Light3",1)
cam.Place(ri)
ri.TransformBegin()
Scene(ri)
ri.TransformEnd()
# end our world
ri.WorldEnd()
# and finally end the rib file
ri.End()
Pythonを使ってRenderManを操る その2
イギリスのbournemouth universityを参考にしました。ありがとうございます。Thank you.
#!/usr/bin/python
# set PYTHONPATH=C:\Python25;C:\Python25\Scripts;%RMANTREE%\bin
import sys
sys.path.append("D:\lighting\PythonClasses")
import math
import getpass
import time,random
# import the python renderman library
import prman
from vector import Vector
from Camera import *
def Scene(ri) :
ri.AttributeBegin()
ri.Attribute( "visibility", {"trace": [1]})
ri.Attribute( "visibility", {"int transmission": [1]})
random.seed(25)
face=[-0.1,-1,-3, 0.1,-1,-3,-0.1,-1,3, 0.1,-1,3]
plank=-5.0
while (plank <=5.0) :
ri.TransformBegin()
ri.Color([random.uniform(0.35,0.4),random.uniform(0.1,0.025),0])
c0=[random.uniform(-10,10),random.uniform(-10,10),random.uniform(-10,10)]
c1=[random.uniform(-10,10),random.uniform(-10,10),random.uniform(-10,10)]
ri.Surface("wood",{"Ks":[0.1],"point c0":c0,"point c1":c1,"float grain":random.randint(2,20)})
ri.Translate(plank,0,0)
ri.Patch("bilinear",{'P':face})
ri.TransformEnd()
plank=plank+0.206
ri.AttributeEnd()
ri.AttributeBegin()
ri.Attribute( "visibility", {"trace": [1]})
ri.Attribute( "visibility", {"int transmission": [1]})
face=[-5,-1,-5, 5,-1,-5,-5,-1,5, 5,-1,5]
ri.TransformBegin()
ri.Color([0.1,0.1,0.1])
ri.Translate(0,-0.5,0.8)
ri.Patch("bilinear",{'P':face})
ri.TransformEnd()
ri.AttributeEnd()
ri.TransformBegin()
ri.AttributeBegin()
ri.Attribute( "visibility", {"trace": [1]})
ri.Attribute( "visibility", {"int transmission": [1]})
ri.Color([0.9,0.9,0.9])
ri.Translate( 0,-1.0,0)
ri.Rotate(-90,1,0,0)
ri.Rotate(36,0,0,1)
ri.Scale(0.4,0.4,0.4)
ri.Surface( "shinymetal", {"string texturename": ["raytrace"]})
#ri.Surface("plastic")
ri.Geometry("teapot")
ri.AttributeEnd()
ri.TransformEnd()
ri.AttributeBegin()
size=0.5
ri.Attribute( "visibility", {"trace": [1]})
ri.Attribute( "visibility", {"int transmission": [1]})
ri.TransformBegin()
ri.Color(( 1, 0.1, 0))
ri.Surface( "plastic")
ri.Translate( 1.05, -0.5, 1.5)
ri.Rotate( -90, 1, 0, 0)
ri.Sphere(size, -size, size,360)
ri.TransformEnd()
ri.AttributeEnd()
ri.AttributeBegin()
ri.Attribute( "visibility", {"trace": [1]})
ri.Attribute( "visibility", {"int transmission": [1]})
ri.TransformBegin()
ri.Color(( 0.1, 1, 0))
ri.Surface( "plastic")
ri.Translate( -1.45, -0.5, 1.2)
ri.Rotate( -90, 1, 0, 0)
ri.Sphere(size, -size, size,360)
ri.TransformEnd()
ri.AttributeEnd()
ri = prman.Ri() # create an instance of the RenderMan interface
#cam=Camera(Vector(4,0.2,4,1),Vector(0,0,0,1),Vector(0,1,0,0))
cam=Camera(Vector(0,2,4,1),Vector(0,-0.5,0,1),Vector(0,1,0,0))
cam.fov=45
#filename = "Camera.rib"
filename = "__render"
ri.Begin(filename)
#ri.Begin(ri.RENDER)
ri.Declare("Light1" ,"string")
ri.Declare("Light2" ,"string")
ri.Declare("Light3" ,"string")
# now we add the display element using the usual elements
# FILENAME DISPLAY Type Output format
#ri.Display("Camera.exr", "framebuffer", "rgba")
ri.Display("Camera02.png", "file", "rgb")
cam.Format(ri)
# now we start our world
ri.WorldBegin()
ri.LightSource("shadowdistant",{ri.HANDLEID:"Light1", "from": [ -10, 10, -10], "to": [ 0, 0, 0], "intensity":[2.0], "string shadowname": ["raytrace"]})
#ri.LightSource( "pointlight", {ri.HANDLEID:"Light1", "point from":[-2,2,4], "float intensity": [50]})
ri.LightSource( "distantlight", {ri.HANDLEID:"Light2", "point to":[-1,-0.03,0], "float intensity": [1]})
ri.LightSource( "distantlight", {ri.HANDLEID:"Light3", "point to":[0,-0.5,-1], "float intensity": [0.2]})
ri.Illuminate("Light1",1)
ri.Illuminate("Light2",1)
ri.Illuminate("Light3",1)
cam.Place(ri)
ri.AttributeBegin()
size=20.0
ri.Attribute( "visibility", {"trace": [1]})
ri.Attribute( "visibility", {"int transmission": [0]})
ri.TransformBegin()
ri.Color(( .2773, .2855, .6679))
ri.Surface( "matte")
ri.Sphere(size, -size, size,360)
ri.TransformEnd()
ri.AttributeEnd()
ri.TransformBegin()
Scene(ri)
ri.TransformEnd()
# end our world
ri.WorldEnd()
# and finally end the rib file
ri.End()
カメラ位置
cam=Camera(Vector(0,0,4,1),Vector(0,-0.5,0,1),Vector(0,1,0,0))
カメラ位置
cam=Camera(Vector(0,2,4,1),Vector(0,-0.5,0,1),Vector(0,1,0,0))
Pythonを使ってRenderManを操る その3
ティーポットをPython APIを利用して増やしてみました。
勉強になります。
ありがとうございます。
#!/usr/bin/python
# set PYTHONPATH=C:\Python25;C:\Python25\Scripts;%RMANTREE%\bin
import sys
sys.path.append("D:\lighting\PythonClasses")
import math
import getpass
import time,random
# import the python renderman library
import prman
from vector import Vector
from Camera import *
def Scene(ri) :
ri.AttributeBegin()
ri.Attribute( "visibility", {"trace": [1]})
ri.Attribute( "visibility", {"int transmission": [1]})
random.seed(25)
face=[-0.1,-1,-10, 0.1,-1,-10,-0.1,-1,10, 0.1,-1,10]
plank=-10.0
while (plank <=10.0) :
ri.TransformBegin()
ri.Color([random.uniform(0.35,0.4),random.uniform(0.1,0.025),0])
c0=[random.uniform(-10,10),random.uniform(-10,10),random.uniform(-10,10)]
c1=[random.uniform(-10,10),random.uniform(-10,10),random.uniform(-10,10)]
ri.Surface("wood",{"Ks":[0.1],"point c0":c0,"point c1":c1,"float grain":random.randint(2,20)})
ri.Translate(plank,0,0)
ri.Patch("bilinear",{'P':face})
ri.TransformEnd()
plank=plank+0.206
ri.AttributeEnd()
ri.AttributeBegin()
ri.Attribute( "visibility", {"trace": [1]})
ri.Attribute( "visibility", {"int transmission": [1]})
face=[-10,-1,-10, 10,-1,-10,-10,-1,10, 10,-1,10]
ri.TransformBegin()
ri.Color([0.1,0.1,0.1])
ri.Translate(0,-0.5,0.8)
ri.Patch("bilinear",{'P':face})
ri.TransformEnd()
ri.AttributeEnd()
ri.TransformBegin()
ri.AttributeBegin()
ri.Attribute( "visibility", {"trace": [1]})
ri.Attribute( "visibility", {"int transmission": [1]})
ri.Color([0.9,0.9,0.9])
ri.Translate( 0,-1.0,0)
ri.Rotate(-90,1,0,0)
ri.Rotate(0,0,0,1)
ri.Scale(0.4,0.4,0.4)
ri.Surface( "shinymetal", {"string texturename": ["raytrace"]})
#ri.Surface("plastic")
ri.Geometry("teapot")
ri.AttributeEnd()
ri.TransformEnd()
for i in range(0,361,12):
ri.TransformBegin()
ri.AttributeBegin()
ri.Attribute( "visibility", {"trace": [1]})
ri.Attribute( "visibility", {"int transmission": [1]})
ri.Color([0.9,0.9,0.9])
ri.Rotate(i,0,1,0)
ri.Translate( 0,-1.0,8)
ri.Rotate(-90,1,0,0)
ri.Rotate(90,0,0,1)
ri.Scale(0.4,0.4,0.4)
ri.Surface( "shinymetal", {"string texturename": ["raytrace"]})
#ri.Surface("plastic")
ri.Geometry("teapot")
ri.AttributeEnd()
ri.TransformEnd()
for i in range(0,361,20):
ri.TransformBegin()
ri.AttributeBegin()
ri.Attribute( "visibility", {"trace": [1]})
ri.Attribute( "visibility", {"int transmission": [1]})
ri.Color([0.9,0.9,0.9])
ri.Rotate(i,0,1,0)
ri.Translate( 0,-1.0,6)
ri.Rotate(-90,1,0,0)
ri.Rotate(30,0,0,1)
ri.Scale(0.4,0.4,0.4)
ri.Surface( "shinymetal", {"string texturename": ["raytrace"]})
#ri.Surface("plastic")
ri.Geometry("teapot")
ri.AttributeEnd()
ri.TransformEnd()
for i in range(0,361,30):
ri.TransformBegin()
ri.AttributeBegin()
ri.Attribute( "visibility", {"trace": [1]})
ri.Attribute( "visibility", {"int transmission": [1]})
ri.Color([0.9,0.9,0.9])
ri.Rotate(i,0,1,0)
ri.Translate( 0,-1.0,4)
ri.Rotate(-90,1,0,0)
ri.Rotate(80,0,0,1)
ri.Scale(0.4,0.4,0.4)
ri.Surface( "shinymetal", {"string texturename": ["raytrace"]})
#ri.Surface("plastic")
ri.Geometry("teapot")
ri.AttributeEnd()
ri.TransformEnd()
ri = prman.Ri() # create an instance of the RenderMan interface
#cam=Camera(Vector(4,0.2,4,1),Vector(0,0,0,1),Vector(0,1,0,0))
cam=Camera(Vector(10,5,-10,1),Vector(0,0,0,1),Vector(0,1,0,0))
cam.fov=45
#filename = "Camera.rib"
filename = "__render"
ri.Begin(filename)
#ri.Begin(ri.RENDER)
ri.Declare("Light1" ,"string")
ri.Declare("Light2" ,"string")
ri.Declare("Light3" ,"string")
# now we add the display element using the usual elements
# FILENAME DISPLAY Type Output format
ri.Display("Camera.exr", "framebuffer", "rgba")
#ri.Display("Camera02.png", "file", "rgb")
cam.Format(ri)
# now we start our world
ri.WorldBegin()
ri.LightSource("shadowdistant",{ri.HANDLEID:"Light1", "from": [ -10, 10, -10], "to": [ 0, 0, 0], "intensity":[2.0], "string shadowname": ["raytrace"]})
#ri.LightSource( "pointlight", {ri.HANDLEID:"Light1", "point from":[-2,2,4], "float intensity": [50]})
ri.LightSource( "distantlight", {ri.HANDLEID:"Light2", "point to":[-1,-0.03,0], "float intensity": [1]})
ri.LightSource( "distantlight", {ri.HANDLEID:"Light3", "point to":[0,-0.5,-1], "float intensity": [0.2]})
ri.Illuminate("Light1",1)
ri.Illuminate("Light2",1)
ri.Illuminate("Light3",1)
cam.Place(ri)
ri.AttributeBegin()
size=20.0
ri.Attribute( "visibility", {"trace": [1]})
ri.Attribute( "visibility", {"int transmission": [0]})
ri.TransformBegin()
ri.Color(( .2773, .2855, .6679))
ri.Surface( "matte")
ri.Sphere(size, -size, size,360)
ri.TransformEnd()
ri.AttributeEnd()
ri.TransformBegin()
Scene(ri)
ri.TransformEnd()
# end our world
ri.WorldEnd()
# and finally end the rib file
ri.End()
Go言語でRenderMan
RenderMan bindings for the Go Language.
Go言語でRenderManをLinuxで設定するのは簡単にできましたが、Windowsにインストールするのは大変でした。Program Filesのスペースに悩まされました。結果としてはPixar RenderManProServerはC:\Program filesにインストールしないで、C:\Pixarにインストールしなおしました。
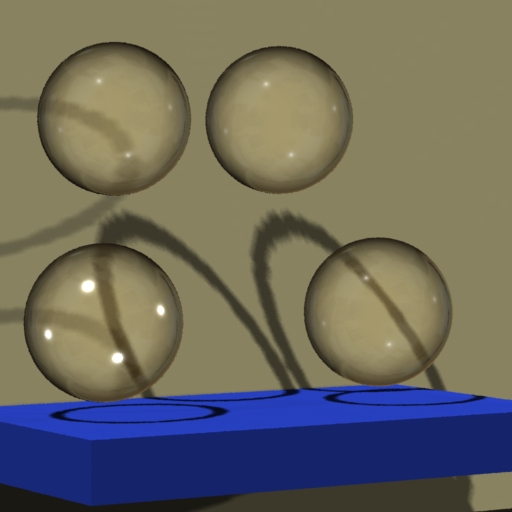
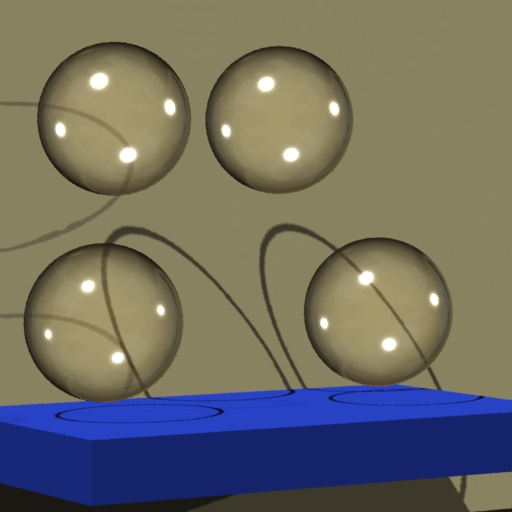
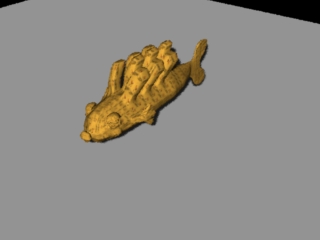
付属go_test.goを実行して得た画像。prman16.5でオクルージョンを出せました。prman17.0、prman18.0ではうまく出ません。
追記2013/10/26:
(prman17以降の仕様変更でocclusionは
Attribute "visibility" "int transmission" [1]
とすれば、きちんと表示されます。)
以下、まとめてみました。
■必要なもの
●Windows 32bitの場合
Go言語32bit版
gccコンパイラ MinGWを使いました。
●Windows64bit版
Go言語64bit版
gccコンパイラ TDM-GCC Compiler Suite for Windowsを使いました。
TDM64 bundleをインストールしました
http://tdm-gcc.tdragon.net/
●RenderMan bindings for the Go Language.
gormanはこちらです。
https://github.com/prideout/gorman
1. Download Zipからファイルgorman-master.zipを取得します
C:\gormanに解凍します。
2. Go言語をC:\goにインストールします
Windows XpへのGo言語のインストールでは、GOPATHは、環境変数として記入する必要があります。バッチでset GOPATH= と設定しても、go envで確認すると反映されていません。
3. gccコンパイラをインストールします
MinGWだと「C++ Compiler」「MSYS Basic System」「MinGW Developer Toolkit」のコンポーネントを選択してインストールします。
環境変数のPathに編集でパスの最後に以下を追記します。
;C:\MinGW
64bitの場合、TDM-GCC Compiler Suite for WindowsをC:\TDM-GCC-64にインストールします。
4. Pixar RenderManProServerをC:\Pixarにインストールします
5. C:\gormanフォルダにコマンドプロンプトを作ります
コマンドプロンプトショートカットアイコンを右クリックしプロパティを開きます。
リンク先の部分を以下のように書き換えます。
%windir%\system32\cmd.exe /k "chcp 65001"
6. Go言語の確認
エディタで以下をhello.goで保存します。保存先C:\gorman
package main
import "fmt"
func main() {
fmt.Printf("hello, world\n")
}
コマンドプロンプトから
>go build hello.go
>hello.exe
hello, world
>
と出ればGoは動いています。
7 gormanの設定
64bitではTDM-GCC Compiler Suite for Windowsを読み込むために、以下のようにバッチファイルを作成します。
ファイル名gobat.bat
保存先C:\gorman
set GOROOT=C:\go
set GOPATH=C:\gorman
set PATH=%GOROOT%\bin;C:\TDM-GCC-64\bin;%PATH%
32bitでは
ファイル名gobat.bat
保存先C:\gorman
set GOROOT=C:\go
set GOPATH=C:\gorman
set PATH=%GOROOT%\bin;%PATH%
バッチファイルができたらコマンドプロンプトで
>gobat.bat
続いて環境を確認します。
>go env
set GOARCH=amd64
set GOBIN=
set GOCHAR=6
set GOEXE=.exe
set GOHOSTARCH=amd64
set GOHOSTOS=windows
set GOOS=windows
set GOPATH=C:\gorman
set GORACE=
set GOROOT=C:\go
set GOTOOLDIR=C:\go\pkg\tool\windows_amd64
set TERM=dumb
set CC=gcc
set GOGCCFLAGS=-g -O2 -m64 -mthreads
set CGO_ENABLED=1
GOPATH=C:\gormanが表記されていないと、この後のパッケージrmanがインストールできません。Windows Xpでは、GOPATHを環境変数として記入する必要があります。
8. rmanパッケージのインストール
C:\gormanのコマンドプロンプトから
>go install ./src/rman
たぶんエラーが出ます。
Pixar RenderManProServerのパスが正確でないためです。
C:\gorman\src\rmanフォルダのrman.goを編集します。
エディタで開き、最初の3行目から6行目部分のパスを以下のような相対パスで記述してください。適宜prmanのバージョンは変えてください。
package rman
// #cgo CFLAGS: -I../../../Pixar/RenderManProServer-18.0/include
// #cgo LDFLAGS: -L../../../Pixar/RenderManProServer-18.0/lib -lprman -Wl,-rpath ../../../Pixar/RenderManProServer-18.0/lib
// #include
// #include "ri.h"
再度C:\gormanのコマンドプロンプトから
>go install ./src/rman
しばらくして・・・何もなかったらOK!!
pkgフォルダができていたら完成です。
9. テストをしてみる
テストの前にPixar RenderManProServerのlibフォルダから
libprman.dllをC:\gorman\src\rmanフォルダへコピーします。
C:\gormanのコマンドプロンプトを閉じていたら
>gobat.bat
続いてテストをします。
>go test ./src/rman
しばらくして、本記事の一番上にある画像が出てきたら成功です。
これはC:\gorman\src\rmanフォルダのrman_test.goを実行しています。
フォルダ内にdebug.ribが書き出されるので便利です。
10. サンプル球をビルドしてみる
続いてlibprman.dllをC:\gormanフォルダへコピーします。
>go build sphere.go
>sphere.exe
レンダリング画像。
その他、開発者Philip RideoutさんのL-Systemによる画像素晴らしいです。
Go And Renderman
https://github.com/prideout/gorman
Thank You.ありがとうございます。
<< 13/15 >>