<< 2/3 >>

NVIDIA Gelatoでアンビエント・オクルージョン

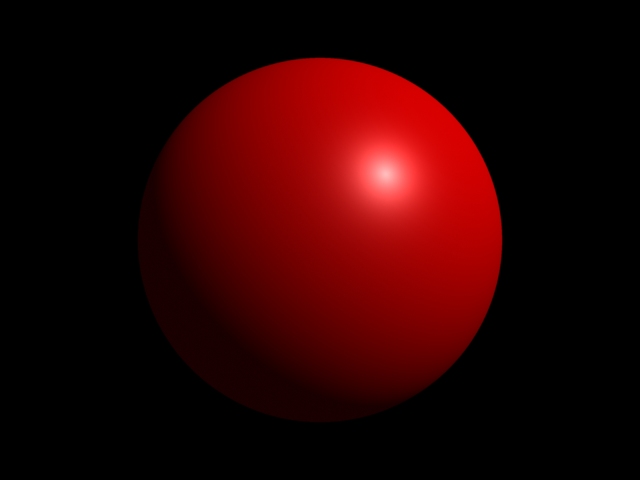
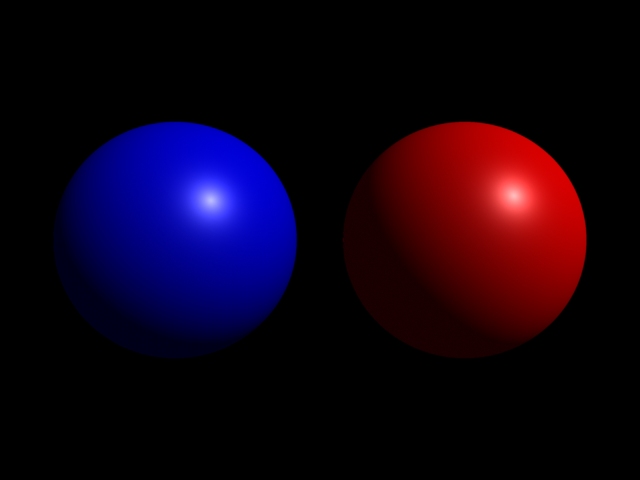
まず、AO(ambient-occlusion)を求める。
#sphere32ao.pyg

Attribute ("int ray:maxdepth", 1)

Output ("sphere32ao.tif", "tiff", "rgb", "camera", "float gain", 1, "float gamma",
1, "string filter", "gaussian", "float[2] filterwidth", (2, 2))
Attribute ("float shadingquality",2)
Attribute ("string projection", "perspective")
Attribute ("float fov", 13)
Attribute ("int[2] resolution", (640, 480))
#placecam -20 15 0 0 0 0
Rotate (-36.87, 1.00, 0.00, 0.00)
Rotate (-90.00, 0.00, 1.00, 0.00)
Translate (20.00, -15.00, 0.00)

Attribute ("string occlusion:spatialdb", "occ.sdb");
Attribute ("string spatialdb:write", "occ.sdb");

World ()
Shader ("surface", "ambocclude", "string occlusionname", "localocclusion", "float samples", 256, "float bias", 0.01)

Attribute ("string geometryset", "+localocclusion")
Attribute ("float occlusion:maxpixeldist", 20)
Attribute ("float occlusion:maxerror", 0.25)

PushTransform ()
Attribute ("color C", (1, 1, 0.25)) #yellow
Translate ( 0, 1, 0)
Sphere (1, -1, 1, 360)
PopTransform ()

PushTransform ()
Attribute ("color C", (0.25, 0.25, 1)) #blue
Translate ( 0, 1, 2.5)
Sphere (1, -1, 1, 360)
PopTransform ()

PushTransform ()
Attribute ("color C", (1, 0.25, 0.25)) #red
Translate ( 0, 1, -2.5)
Sphere (1, -1, 1, 360)
PopTransform ()

Attribute ("color C", (1, 1, 1))
Rotate (90.00, 1.00, 0.00, 0.00)
Input("PlaneGeom.rib")
Render()

sphere3_ao.jpg

つづいて、Photoshopでレイヤーに入れて乗算処理する。
sphere3_multi.jpg
  • -
  • -

NVIDIA Gelatoでcheckerを利用する

Shaderをレイヤーで合わせることができるから、ちょっと面白いかも。
とりあえず、繰り返し処理はfor文を使う。

#box_check.pyg
Output ("box_check.tif", "tiff", "rgb", "camera", "float gain", 1, "float gamma",
1, "string filter", "gaussian", "float[2] filterwidth", (2, 2))
Attribute ("float shadingquality",1.2)
Attribute ("string projection", "perspective")
Attribute ("float fov", 20)
Attribute ("int[2] resolution", (640, 480))
#placecam 10 5 -10 0 0 0
Rotate (-19.47, 1.00, 0.00, 0.00)
Rotate (45.00, 0.00, 1.00, 0.00)
Translate (-10.00, -5.00, 10.00)

#Attribute ( "int ray:shadows", 0 )
Attribute ("string geometryset", "+shadows")
Attribute ("string geometryset", "+reflection")

World ()
Light ("light1", "pointlight", "float intensity", 400, "point from", (-10, 10, -10),"string shadowname", "shadows")
Light ("light2", "pointlight", "float intensity", 400, "point from", (10, 10, -10),"string shadowname", "shadows")

PushTransform ()
Attribute ("color C", (0.2, 0.4, 0.75))
Sphere (100, -100, 100, 360)
PopTransform ()

for i in range(5):
PushTransform ()
Attribute ("color C", (1, 1, 1))
Shader ( "surface", "metal","string envname","reflection" )
#Shader ("surface", "plastic")
i=1.2*i
Translate ( 0, 0.5, i-2)
Input ("BoxGeom.rib")
PopTransform ()


Attribute ("color C", (1, 1, 1))
Rotate (90.00, 1.00, 0.00, 0.00)
ShaderGroupBegin ()
Shader ("surface", "checker","layer1","float stilesize", .1, "float ttilesize", .1)
Shader ("surface", "plastic", "layer2")
ConnectShaders ("layer1", "Cout", "layer2", "C")
ShaderGroupEnd ()
Input("PlaneGeom.rib")
Render()

box_check.jpg
  • -
  • -

checkerの色を変更する


#sphere_check.pyg
Output ("sphere_check.tif", "tiff", "rgb", "camera", "float gain", 1, "float gamma",
1, "string filter", "gaussian", "float[2] filterwidth", (2, 2))
Attribute ("string projection", "perspective")
Attribute ("float fov", 45)
Attribute ("int[2] resolution", (640, 480))
Light ("light1", "ambientlight", "float intensity", 0.1)
Light ("light2", "distantlight", "point from", (1, 1, -1), "point to", (0, 0, 0)
, "float intensity", 1.5)
Rotate (-10.14, 1, 0, 0)
Rotate (26.57, 0, 1, 0)
Translate (-5, -2, 10)
World ()

ShaderGroupBegin ()
Attribute ("color C", (1, 1, 0))
Shader ("surface", "checker", "checklayer","float stilesize",0.1,"float ttilesize",0.1,"color color2", ( 0, 0, 1 ))
Shader ("surface", "plastic", "plasticlayer")
ConnectShaders ("checklayer", "Cout", "plasticlayer", "C")
ConnectShaders ("checklayer", "fout", "plasticlayer", "Ks")
ShaderGroupEnd ()
Rotate (90, 1, 0, 0)
Sphere (3, -3, 3, 360)
Render()


sphere_check.jpg
  • -
  • -

"while" を使って、ズラリと並べてみる

POV-Rayの例を参考にしました。
参考にしたのはhttp://agata.ciao.jp/graphic/tips/chapter3.html
大変、勉強になります。ありがとうございます。

RotateとTranslateが逆になるところが違いになりますか。
RenderManやGelatoの記述での変換は、下から上に変換していきます。
box_kaiten1.jpg

#box_kaiten.pyg
Output ("box_kaiten.tif", "tiff", "rgb", "camera", "float gain", 1, "float gamma",
1, "string filter", "gaussian", "float[2] filterwidth", (2, 2))
Attribute ("float shadingquality",1.2)
Attribute ("string projection", "perspective")
Attribute ("float fov", 20)
Attribute ("int[2] resolution", (640, 480))
#placecam 10 5 -10 0 0 0
Rotate (-19.47, 1.00, 0.00, 0.00)
Rotate (45.00, 0.00, 1.00, 0.00)
Translate (-10.00, -5.00, 10.00)

Attribute ( "int ray:shadows", 1 )
Attribute ("string geometryset", "+shadows")
Attribute ("string geometryset", "+reflection")

World ()
Light ("light1", "pointlight", "float intensity", 400, "point from", (-10, 10, -10),"string shadowname", "shadows")
Light ("light2", "pointlight", "float intensity", 400, "point from", (10, 10, -10),"string shadowname", "shadows")

PushTransform ()
Attribute ("color C", (0.2, 0.4, 0.75))
Sphere (100, -100, 100, 360)
PopTransform ()

J=1
while J<=8:
PushTransform ()
Attribute ("color C", (1, 1, 1))
Shader ( "surface", "metal","string envname","reflection" )
Rotate (360/8.0*J, 0, 1, 0)
Translate ( 2.5, 0.5, 0)
Input ("BoxGeom.rib")
PopTransform ()
J+=1

Attribute ("color C", (1, 1, 1))
Rotate (90.00, 1.00, 0.00, 0.00)
ShaderGroupBegin ()
Shader ("surface", "checker","layer1","float stilesize", .1, "float ttilesize", .1)
Shader ("surface", "shinyplastic","layer2")
ConnectShaders ("layer1", "Cout", "layer2", "C")
ShaderGroupEnd ()
Input("PlaneGeom.rib")
Render()
  • -
  • -

ズラリと並べる その2

参考にしたのはhttp://agata.ciao.jp/graphic/tips/chapter3.html
大変、勉強になります。ありがとうございます。

box_kaiten2.jpg


#box_kaiten2.pyg

from math import *

Output ("box_kaiten2.tif", "tiff", "rgb", "camera", "float gain", 1, "float gamma",
1, "string filter", "gaussian", "float[2] filterwidth", (2, 2))
Attribute ("float shadingquality",1.2)
Attribute ("string projection", "perspective")
Attribute ("float fov", 20)
Attribute ("int[2] resolution", (640, 480))
#placecam 10 5 -10 0 0 0
Rotate (-19.47, 1.00, 0.00, 0.00)
Rotate (45.00, 0.00, 1.00, 0.00)
Translate (-10.00, -5.00, 10.00)

Attribute ( "int ray:shadows", 1 )
Attribute ("string geometryset", "+shadows")
Attribute ("string geometryset", "+reflection")

World ()
Light ("light1", "pointlight", "float intensity", 400, "point from", (-10, 10, -10),"string shadowname", "shadows")
Light ("light2", "pointlight", "float intensity", 400, "point from", (10, 10, -10),"string shadowname", "shadows")

PushTransform ()
Attribute ("color C", (0.2, 0.4, 0.75))
Sphere (100, -100, 100, 360)
PopTransform ()

N1=16
J=1
while J<=N1:
PushTransform ()
Attribute ("color C", (0.5*(1+sin(2*pi/N1*J)),0.5, 0.5*(1+cos(2*pi/N1*J))))
Shader ( "surface", "plastic")
Rotate (360/N1*J, 0, 1, 0)
Translate ( 3.2, 0.5, 0)
Input ("BoxGeom.rib")
PopTransform ()
J+=1

Attribute ("color C", (1, 1, 1))
Rotate (90.00, 1.00, 0.00, 0.00)
ShaderGroupBegin ()
Shader ("surface", "checker","layer1","float stilesize", .1, "float ttilesize", .1)
Shader ("surface", "shinyplastic","layer2")
ConnectShaders ("layer1", "Cout", "layer2", "C")
ShaderGroupEnd ()
Input("PlaneGeom.rib")
Render()
  • -
  • -

NVIDIA gelatoで球を並べてみる その3

さらに参考にしながら、いじってみる。
http://agata.ciao.jp/graphic/tips/chapter3.html
rotate<0,30,-60>とある部分の順番がわからない。
とりあえず、適当。
ありがとうございます。
kaiten3.jpg

#kaiten3.pyg
from math import *

Output ("kaiten3.tif", "tiff", "rgb", "camera", "float gain",
1, "float gamma", 1, "string filter", "gaussian", "float[2] filterwidth", (2, 2))
Attribute ("float shadingquality",1.2)
Attribute ("string projection", "perspective")
Attribute ("float fov", 45)
Attribute ("int[2] resolution", (640, 480))
#placecam 10 5 -10 0 0 0
Rotate (-19.47, 1.00, 0.00, 0.00)
Rotate (45.00, 0.00, 1.00, 0.00)
Translate (-10.00, -5.00, 10.00)

Attribute ( "int ray:shadows", 1 )
Attribute ("string geometryset", "+shadows")
Attribute ("string geometryset", "+reflection")

World ()
Light ("light1", "pointlight", "float intensity", 400, "point from", (-10, 10, -10),"string shadowname", "shadows")
Light ("light2", "pointlight", "float intensity", 400, "point from", (10, 10, -10),"string shadowname", "shadows")

PushTransform ()
Attribute ("color C", (0.2, 0.4, 0.75))
Sphere (100, -100, 100, 360)
PopTransform ()

N1=32
N2=8
K=1
while K<=N2:
J=1
while J<=N1:
PushTransform ()
Attribute ("color C", (0.5*(1+sin(2*pi/N1*J)),0.5, 0.5*(1+cos(2*pi/N1*J))))
Shader ( "surface", "plastic")
Translate (0,1,0)
Rotate (30, 0, 1, 0)
Rotate (-60,0, 0, 1)
Rotate (360/(N2*N1)*(K*N1+J),1,0,0)
Translate (0,0,5)
Rotate (360/N1*J, 0, 1, 0)
Translate ( 2, 0.5, 0)
Sphere (0.2, -0.2, 0.2, 360)
PopTransform ()
J+=1
K+=1

Attribute ("color C", (1, 1, 1))
Rotate (90.00, 1.00, 0.00, 0.00)
ShaderGroupBegin ()
Shader ("surface", "checker","layer1","float stilesize", .1, "float ttilesize", .1)
Shader ("surface", "shinyplastic","layer2")
ConnectShaders ("layer1", "Cout", "layer2", "C")
ShaderGroupEnd ()
Input("PlaneGeom.rib")
Render()
  • -
  • -

NVIDIA gelatoで球体 その4

Rotate (-60, 0, 0, 1)
Rotate (30, 0, 1, 0)
順番を入れ替えてみた。

kaiten4.jpg

ありがとうございます。
  • -
  • -

obj読み込み

本来ならば、コンバータをつくればよいのだろうが、
ここはcgkitを使ってobjをribに変換した。
cgkitでは、
>render.py -rレンダラ hogehoge.obj
とやると、指定のレンダラでレンダリング、geomフォルダができて
その中に、ribが生成される。これをgelatoに読み込んでみた。

このobjでは法線ベクトルがないので、カクカクしている。
chawan.jpg

#cha0.pyg
Output ("cha01.tif", "tiff", "rgb", "camera", "float gain", 1, "float gamma",
1, "string filter", "gaussian", "float[2] filterwidth", (2, 2))
Attribute ("string projection", "perspective")
Attribute ("float fov", 20)
Attribute ("int[2] resolution", (640, 480))
#placecam 10 5 -10 0 0 0
Rotate (-19.47, 1.00, 0.00, 0.00)
Rotate (45.00, 0.00, 1.00, 0.00)
Translate (-10.00, -5.00, 10.00)

Attribute ("string geometryset", "+shadows")

World ()
Light ("light1", "pointlight", "float intensity", 350, "point from", (-10, 10, -10),"string shadowname", "shadows")
Light ("light2", "pointlight", "float intensity", 350, "point from", (10, 10, -10),"string shadowname", "shadows")

PushTransform ()
Attribute ("color C", (1, 1, 0.9))
Shader ("surface", "veinedmarble")
Scale (20,20,20)
Translate ( 0, 0, 0)
Input ("chawan.rib")
PopTransform ()

Attribute ("color C", (1, 1, 1))
Shader ("surface", "plastic")
Rotate (90.00, 1.00, 0.00, 0.00)
Input("PlaneGeom.rib")
Render()
  • -
  • -

NVIDIA Gelato 平面状で反射する直線

POV−Rayと数学の関連を紹介しているサイトを参考にしました。
「数学のいずみ」http://izumi-math.jp/sanae/Pov_Ray/Pov_Ray.htm
くりかえし処理whileを使ってTranslateを変更していきました。
連続した球体が生成されます。
勉強になります。ありがとうございます。
sphere_hansya.jpg

#sphere_hansya.pyg
Output ("sphere_hansya.tif", "tiff", "rgb", "camera", "float gain", 1, "float gamma",
1, "string filter", "gaussian", "float[2] filterwidth", (2, 2))
Attribute ("float shadingquality",1.2)
Attribute ("string projection", "perspective")
Attribute ("float fov", 30)
Attribute ("int[2] resolution", (640, 480))
#placecam 0 10 -60 0 0 0
Rotate (-9.46, 1.00, 0.00, 0.00)
Translate (0.00, -10.00, 60.00)

Attribute ("string geometryset", "+shadows")
Attribute ("string geometryset", "+reflection")

World ()
Light ( "light0", "ambientlight", "float intensity", 0.3 )
Light ("light1", "pointlight", "float intensity", 400, "point from", (0, 20, -10),"string shadowname", "shadows")
Light ("light2", "pointlight", "float intensity", 400, "point from", (5, 0, -10),"string shadowname", "shadows")

PushTransform ()
Attribute ("color C", (0.2, 0.4, 0.75))
Sphere (100, -100, 100, 360)
PopTransform ()

MyCounter = -5
while (MyCounter <= 5):
PushTransform ()
Attribute ("color C", (1, 1, 1))
Shader ( "surface", "metal","string envname","reflection" )
Translate ( 2*MyCounter+1, abs(3*MyCounter+2),4*MyCounter+3)
Sphere (0.8, -0.8, 0.8, 360)
PopTransform ()
MyCounter = MyCounter + 0.5


Attribute ("color C", (1, 1, 1))
Rotate (90.00, 1.00, 0.00, 0.00)
Scale (10,10,10)
ShaderGroupBegin ()
Attribute ("color C", (1, 1, 0))
Shader ("surface", "checker", "checklayer","float stilesize",0.1,"float ttilesize",0.1,"color color2", ( 0, 0, 1 ))
Shader ("surface", "plastic", "plasticlayer")
ConnectShaders ("checklayer", "Cout", "plasticlayer", "C")
ConnectShaders ("checklayer", "fout", "plasticlayer", "Ks")
ShaderGroupEnd ()
Input("PlaneGeom.rib")
Render()
  • -
  • -

NVIDIA Gelato ばね状トーラス

今回も「数学のいずみ」を参考にしました。ありがとうございます。
sphere_bane_torus.jpg

#sphere_bane_torus.pyg
from math import *

Output ("sphere_bane_torus.tif", "tiff", "rgb", "camera", "float gain", 1, "float gamma",
1, "string filter", "gaussian", "float[2] filterwidth", (2, 2))
Attribute ("float shadingquality",1.2)
Attribute ("string projection", "perspective")
Attribute ("float fov", 20)
Attribute ("int[2] resolution", (640, 480))
#placecam 0 16 -12 0 0 0
Rotate (-53.13, 1.00, 0.00, 0.00)
Translate (0.00, -16.00, 12.00)

Attribute ("string geometryset", "+shadows")
Attribute ("string geometryset", "+reflection")

World ()
Light ( "light0", "ambientlight", "float intensity", 0.3 )
Light ("light1", "pointlight", "float intensity", 300, "point from", (0, 10, -10),"string shadowname", "shadows")
Light ("light2", "pointlight", "float intensity", 300, "point from", (5, 0, -10),"string shadowname", "shadows")

PushTransform ()
Attribute ("color C", (0.2, 0.4, 0.75))
Sphere (100, -100, 100, 360)
PopTransform ()

MyCounter = -15*pi
while (MyCounter <= 15*pi):
PushTransform ()
Attribute ("color C", (1, 1, 1))
Shader ( "surface", "metal","string envname","reflection" )
Translate ( (2+0.5*cos(1.11*MyCounter))*cos(0.1*MyCounter),
(2+0.5*cos(1.11*MyCounter))*sin(0.1*MyCounter),
0.5*sin(1.11*MyCounter))
Sphere (0.13, -0.13, 0.13, 360)
PopTransform ()
MyCounter = MyCounter + 0.5


Translate (0, -5, 0)
Rotate (90.00, 1.00, 0.00, 0.00)
Scale (10,10,10)
ShaderGroupBegin ()
Attribute ("color C", (0, 0.8, 0))
Shader ("surface", "checker", "checklayer","float stilesize",0.01,"float ttilesize",0.01,"color color2", ( 0, 0, 0.9 ))
Shader ("surface", "plastic", "plasticlayer")
ConnectShaders ("checklayer", "Cout", "plasticlayer", "C")
ConnectShaders ("checklayer", "fout", "plasticlayer", "Ks")
ShaderGroupEnd ()
Input("PlaneGeom.rib")
Render()
  • -
  • -

<< 2/3 >>