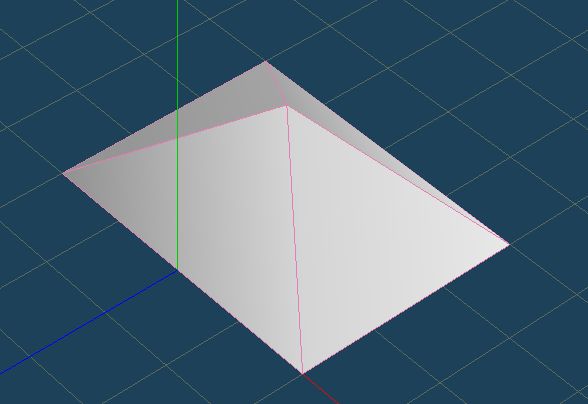
Rendering学習日記

日々、3DCGの世界は進歩しています。勉強して理解したことをまとめていきます。RenderMan互換レンダラーやグローバル・イルミネーション。いろんなことに好奇心を持って、面白くなる。目指せShader書き!!
ありがとうございます。

四角すいの拡大縮小

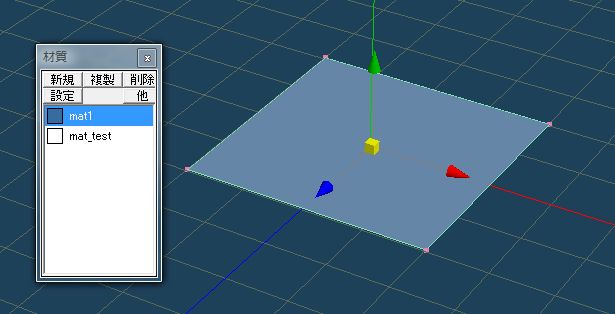
メタセコイアのPythonインターフェイスで、拡大縮小Scalingをやってみた。先に四角すいを作っておき、オブジェクトパネルで選択しておいて、下記のスクリプトを実行します。それぞれの頂点が変換行列でガシガシとうごいてくれます。使い方が広がります。Pythonスクリプト面白くなってきた。

# meta_scale2.py
doc = MQSystem.getDocument()

curidx = doc.currentObjectIndex
if curidx != -1:
obj = doc.object[curidx]
if not (obj is None):
MQSystem.println(obj.name)
# show global inverse matrix
mtx = doc.getGlobalInverseMatrix(obj)
for r in range(1,5):
MQSystem.println("|%(a) .3f %(b) .3f %(c) .3f %(d) .3f|" % {"a":mtx.get(r,1), "b":mtx.get(r,2), "c":mtx.get(r,3), "d":mtx.get(r,4)})

MQSystem.println(str(obj.scaling))
scl=obj.scaling
scl.x= 2 #x方向拡大率
scl.y= 0.5 #y方向拡大率
scl.z= 1.5 #z方向拡大率
obj.scaling=scl
MQSystem.println(str(obj.scaling))

mtx2 = doc.getGlobalMatrix(obj)
MQSystem.println(str(mtx2))

obj2 = MQSystem.newObject()

# show vertices
numVert = obj.numVertex
for i in range(0,numVert):
pos = obj.vertex[i].getPos()
MQSystem.println(" v[" + `i` + "] " + str(mtx2.mult(pos)))
obj2.addVertex(mtx2.mult(pos))

obj2.addFace([0,3,2,1]) #4kakusui
obj2.addFace([4,1,2])
obj2.addFace([4,2,3])
obj2.addFace([4,3,0])
obj2.addFace([4,0,1])
doc.deleteObject(curidx)
doc.addObject( obj2 )


拡大率に-1を入れれば、裏返し反転ですね。CGの基礎基本勉強になります。ありがとうございます。
scale1.jpg
  • -
  • -

■マテリアル情報を取得する

メタセコイア付属のPythonサンプルスクリプトを試してみる。
1.基本図形から平面を作成
2.材質パネルから新規で赤色を入れたmat1を作成
3.選択部処理で平面にmat1を割り当てる。
4.平面を選択したままスクリプトエディタより、material.pyを実行する。
以下のように情報が出力された。
mat1
color : [1.000, 0.043, 0.122]
dif : 0.800
amb : 0.600
emi : 0.000
spc : 0.000
pow : 5.000
mapping : 0 (UV)
vertex-color : 0
shader : 3 (Phong)
  • -
  • -

■カラーを変更する

平面に割り当てたマテリアルをmetasequoia python scriptで変更する。
当初colorを出力するのに、
MQSystem.println(str(doc.material[0].color))

と記述すると
[0.220, 0.420, 0.620]

とリストで出てくるので、color[0],color[1],color[2]とできると思い込んでいました。
Inappropriate argument type.やAttributeエラーが出てしまい困りました。
ヘルプを参照したら、colorは、red,green,blueではありませんか。
MQSystem.println(str(doc.material[0].color.green))
doc.material[0].color.red=0.22
doc.material[0].color.green=0.42
doc.material[0].color.blue=0.62


と表記すれば、カラー変更が可能になりました。

最初に平面を作成し、mat1を作成し、平面に割り当てておき、以下のスクリプトを実行すると、カラー等が変更されます。
doc = MQSystem.getDocument()
num = doc.numMaterial
for x in range(0,num):
mat = doc.material[x]
if mat is None: continue
MQSystem.println(mat.name)
MQSystem.println(" color : " + str(mat.color))
MQSystem.println(" dif : %(#).3f" % {"#":mat.diffuse})
MQSystem.println(" amb : %(#).3f" % {"#":mat.ambient})
MQSystem.println(" emi : %(#).3f" % {"#":mat.emissive})
MQSystem.println(" spc : %(#).3f" % {"#":mat.specular})
MQSystem.println(" pow : %(#).3f" % {"#":mat.power})
if mat.mapType == 0:
MQSystem.println(" mapping : 0 (UV)")
elif mat.mapType == 1:
MQSystem.println(" mapping : 1 (flat)")
elif mat.mapType == 2:
MQSystem.println(" mapping : 2 (cyrindical)")
elif mat.mapType == 3:
MQSystem.println(" mapping : 3 (spherical)")
if mat.mapType != 0:
MQSystem.println(" map-scaling : " + str(mat.mapScaling))
MQSystem.println(" map-angle : " + str(mat.mapAngle))
MQSystem.println(" map-position : " + str(mat.mapPosition))
MQSystem.println(" vertex-color : %(#)d" % {"#":mat.vertexColor})
MQSystem.println(" shader : %(#)d (" % {"#":mat.shader} + mat.shaderName + ")")
if mat.textureMap != "":
MQSystem.println(" texture-map : " + mat.textureMap)
path = mat.getTextureMapPath()
if not (path is None):
MQSystem.println(" texture-map-path : " + path)
if mat.alphaMap != "":
MQSystem.println(" alpha-map : " + mat.alphaMap)
path = mat.getAlphaMapPath()
if not (path is None):
MQSystem.println(" alpha-map-path : " + path)
if mat.bumpMap != "":
MQSystem.println(" bump-map : " + mat.bumpMap)
path = mat.getBumpMapPath()
if not (path is None):
MQSystem.println(" bump-map-path : " + path)

MQSystem.println(str(doc.material[0].color))
doc.material[0].diffuse=0.2
doc.material[0].ambient=1.0
doc.material[0].emissive=0.5
doc.material[0].specular=0.2
MQSystem.println(str(doc.material[0].color.green))
doc.material[0].color.red=0.22
doc.material[0].color.green=0.42
doc.material[0].color.blue=0.62


mat2=MQSystem.newMaterial()
mat2.name="mat_test"
doc.addMaterial(mat2)
num = doc.numMaterial
MQSystem.println(str(num))

mat1.jpg
そのほか、拡散光や反射など設定を変更することもできます。いろいろと数値を変更して実験してみましょう。

出力結果例:
mat1
color : [0.620, 0.059, 0.059]
dif : 0.800
amb : 0.580
emi : 0.000
spc : 0.000
pow : 5.000
mapping : 0 (UV)
vertex-color : 0
shader : 3 (Phong)
[0.620, 0.059, 0.059]
0.0588235296309
  • -
  • -
<< 8/25 >>